Blender 3D AI Render


Details
Download Files (1)
Model description
What is Neural Render?
Neural Render is a Blender add-on that integrates AI models from Replicate into your Blender workflow. It allows you to process rendered images with AI, enhancing their quality and resolution or generating new images based on your renders directly within Blender.
Why Replicate?
While we can use local models for inference, making the project truly open-source, the first version was built on top of Replicate – cloud computing provider, to ensure we can run any models in the cloud with great speed and quality. I plan to publish updates on this workflow when we’ll be closer to on-device image inference.
Render Will Never Be The Same
While traditional render still is very important and nothing can be compared to its flexibility, there are already many applications AI render could be better, or even replace the traditional approach. I will show you some of the recently discovered.
Current Features:
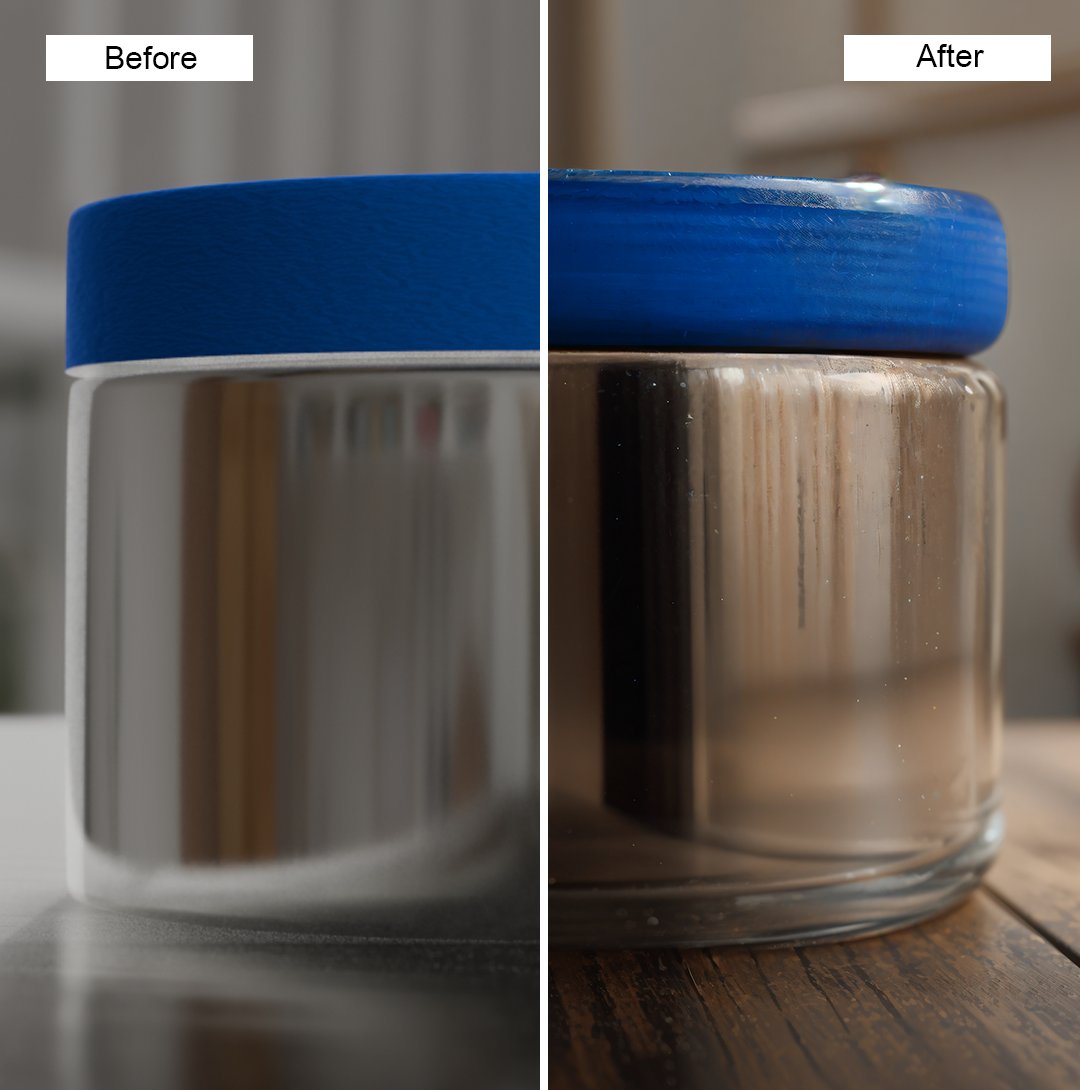
Upscale and enhance rendered images using Clarity Upscaler
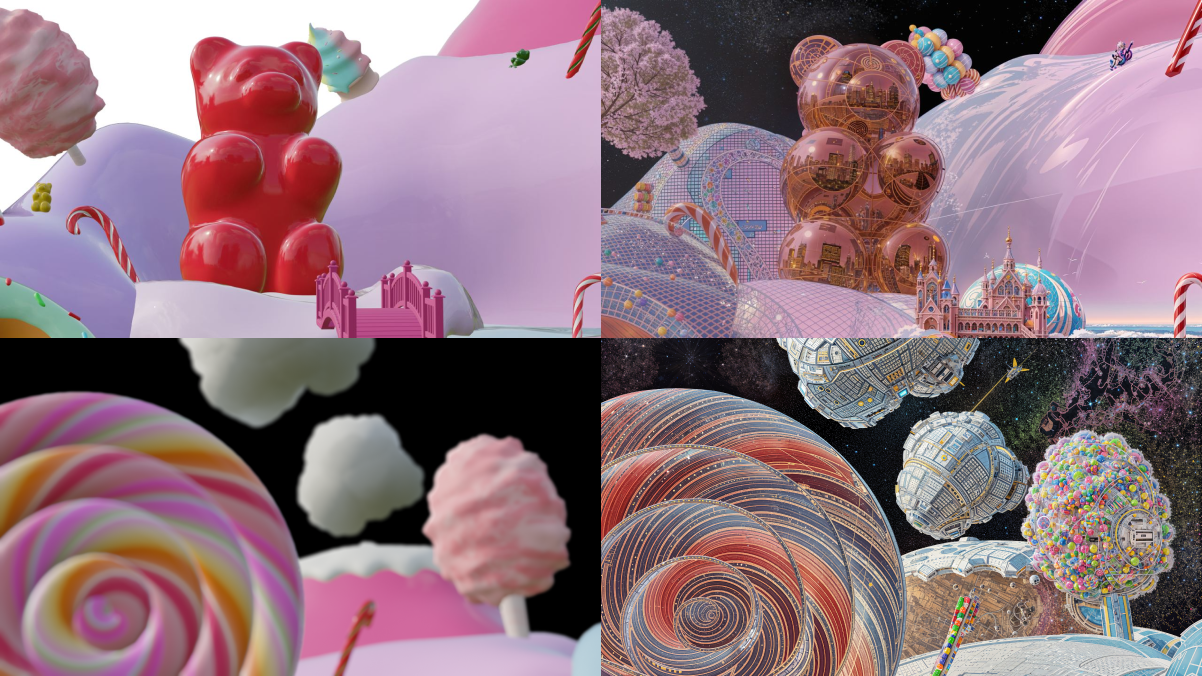
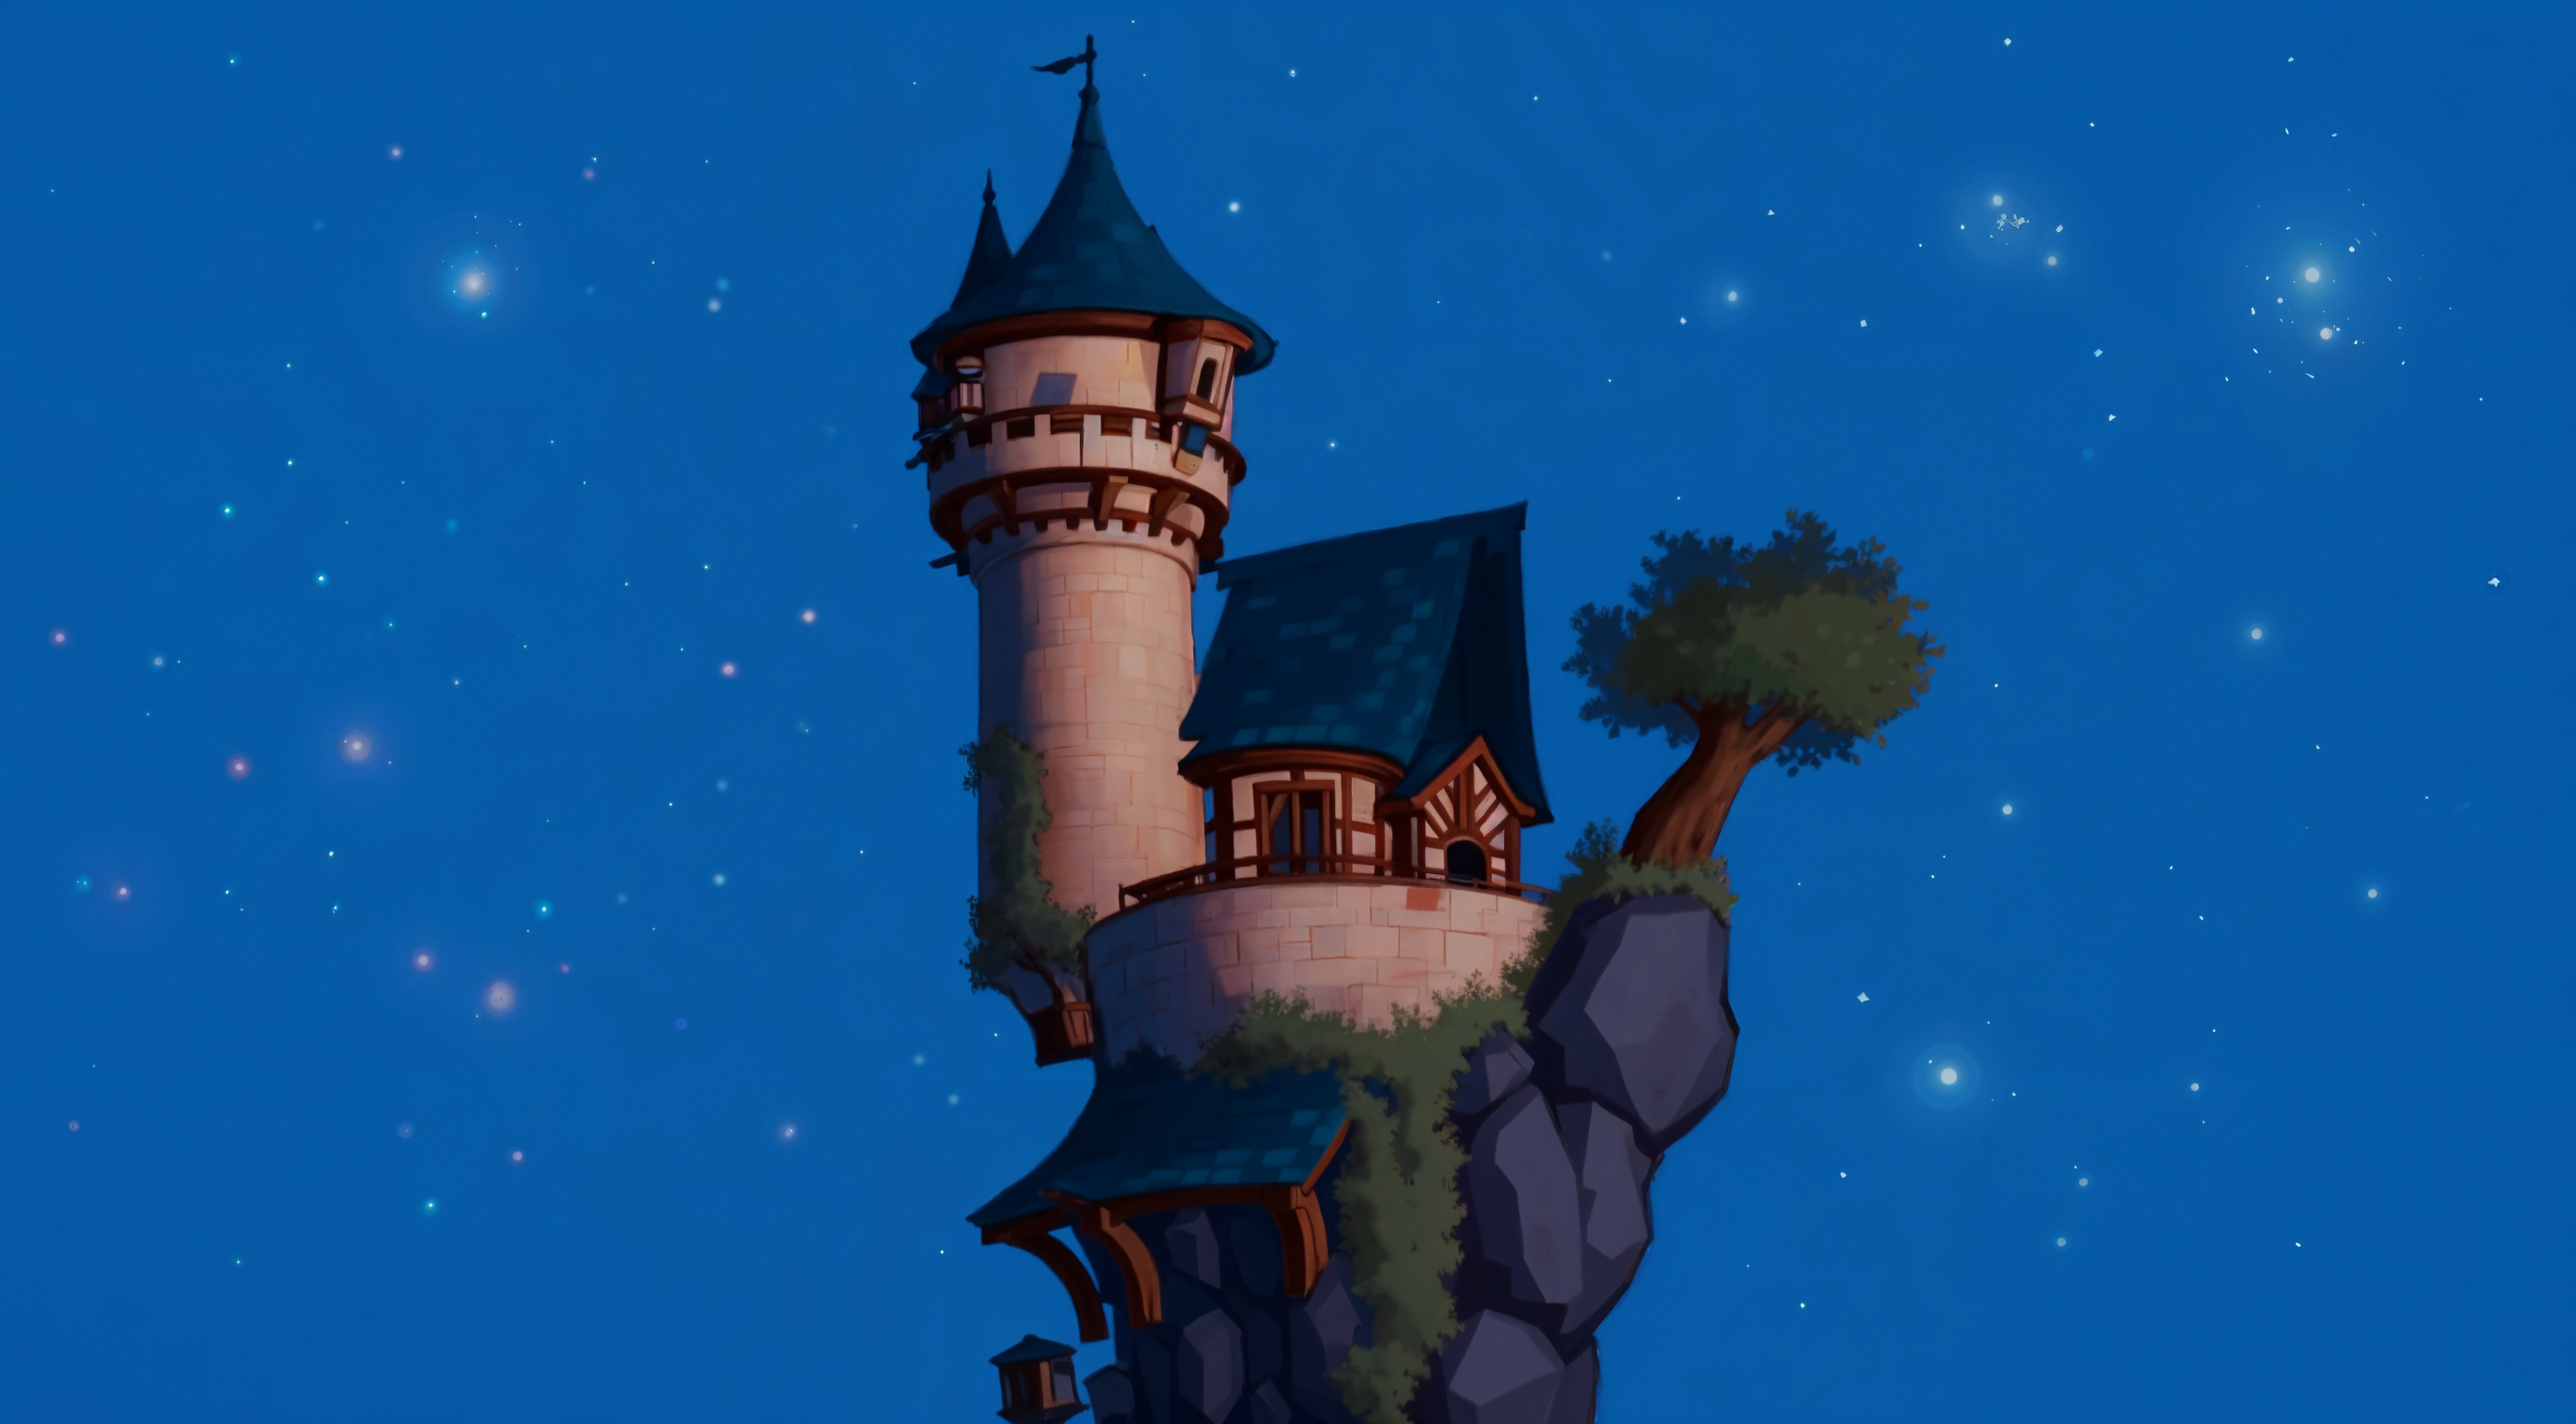
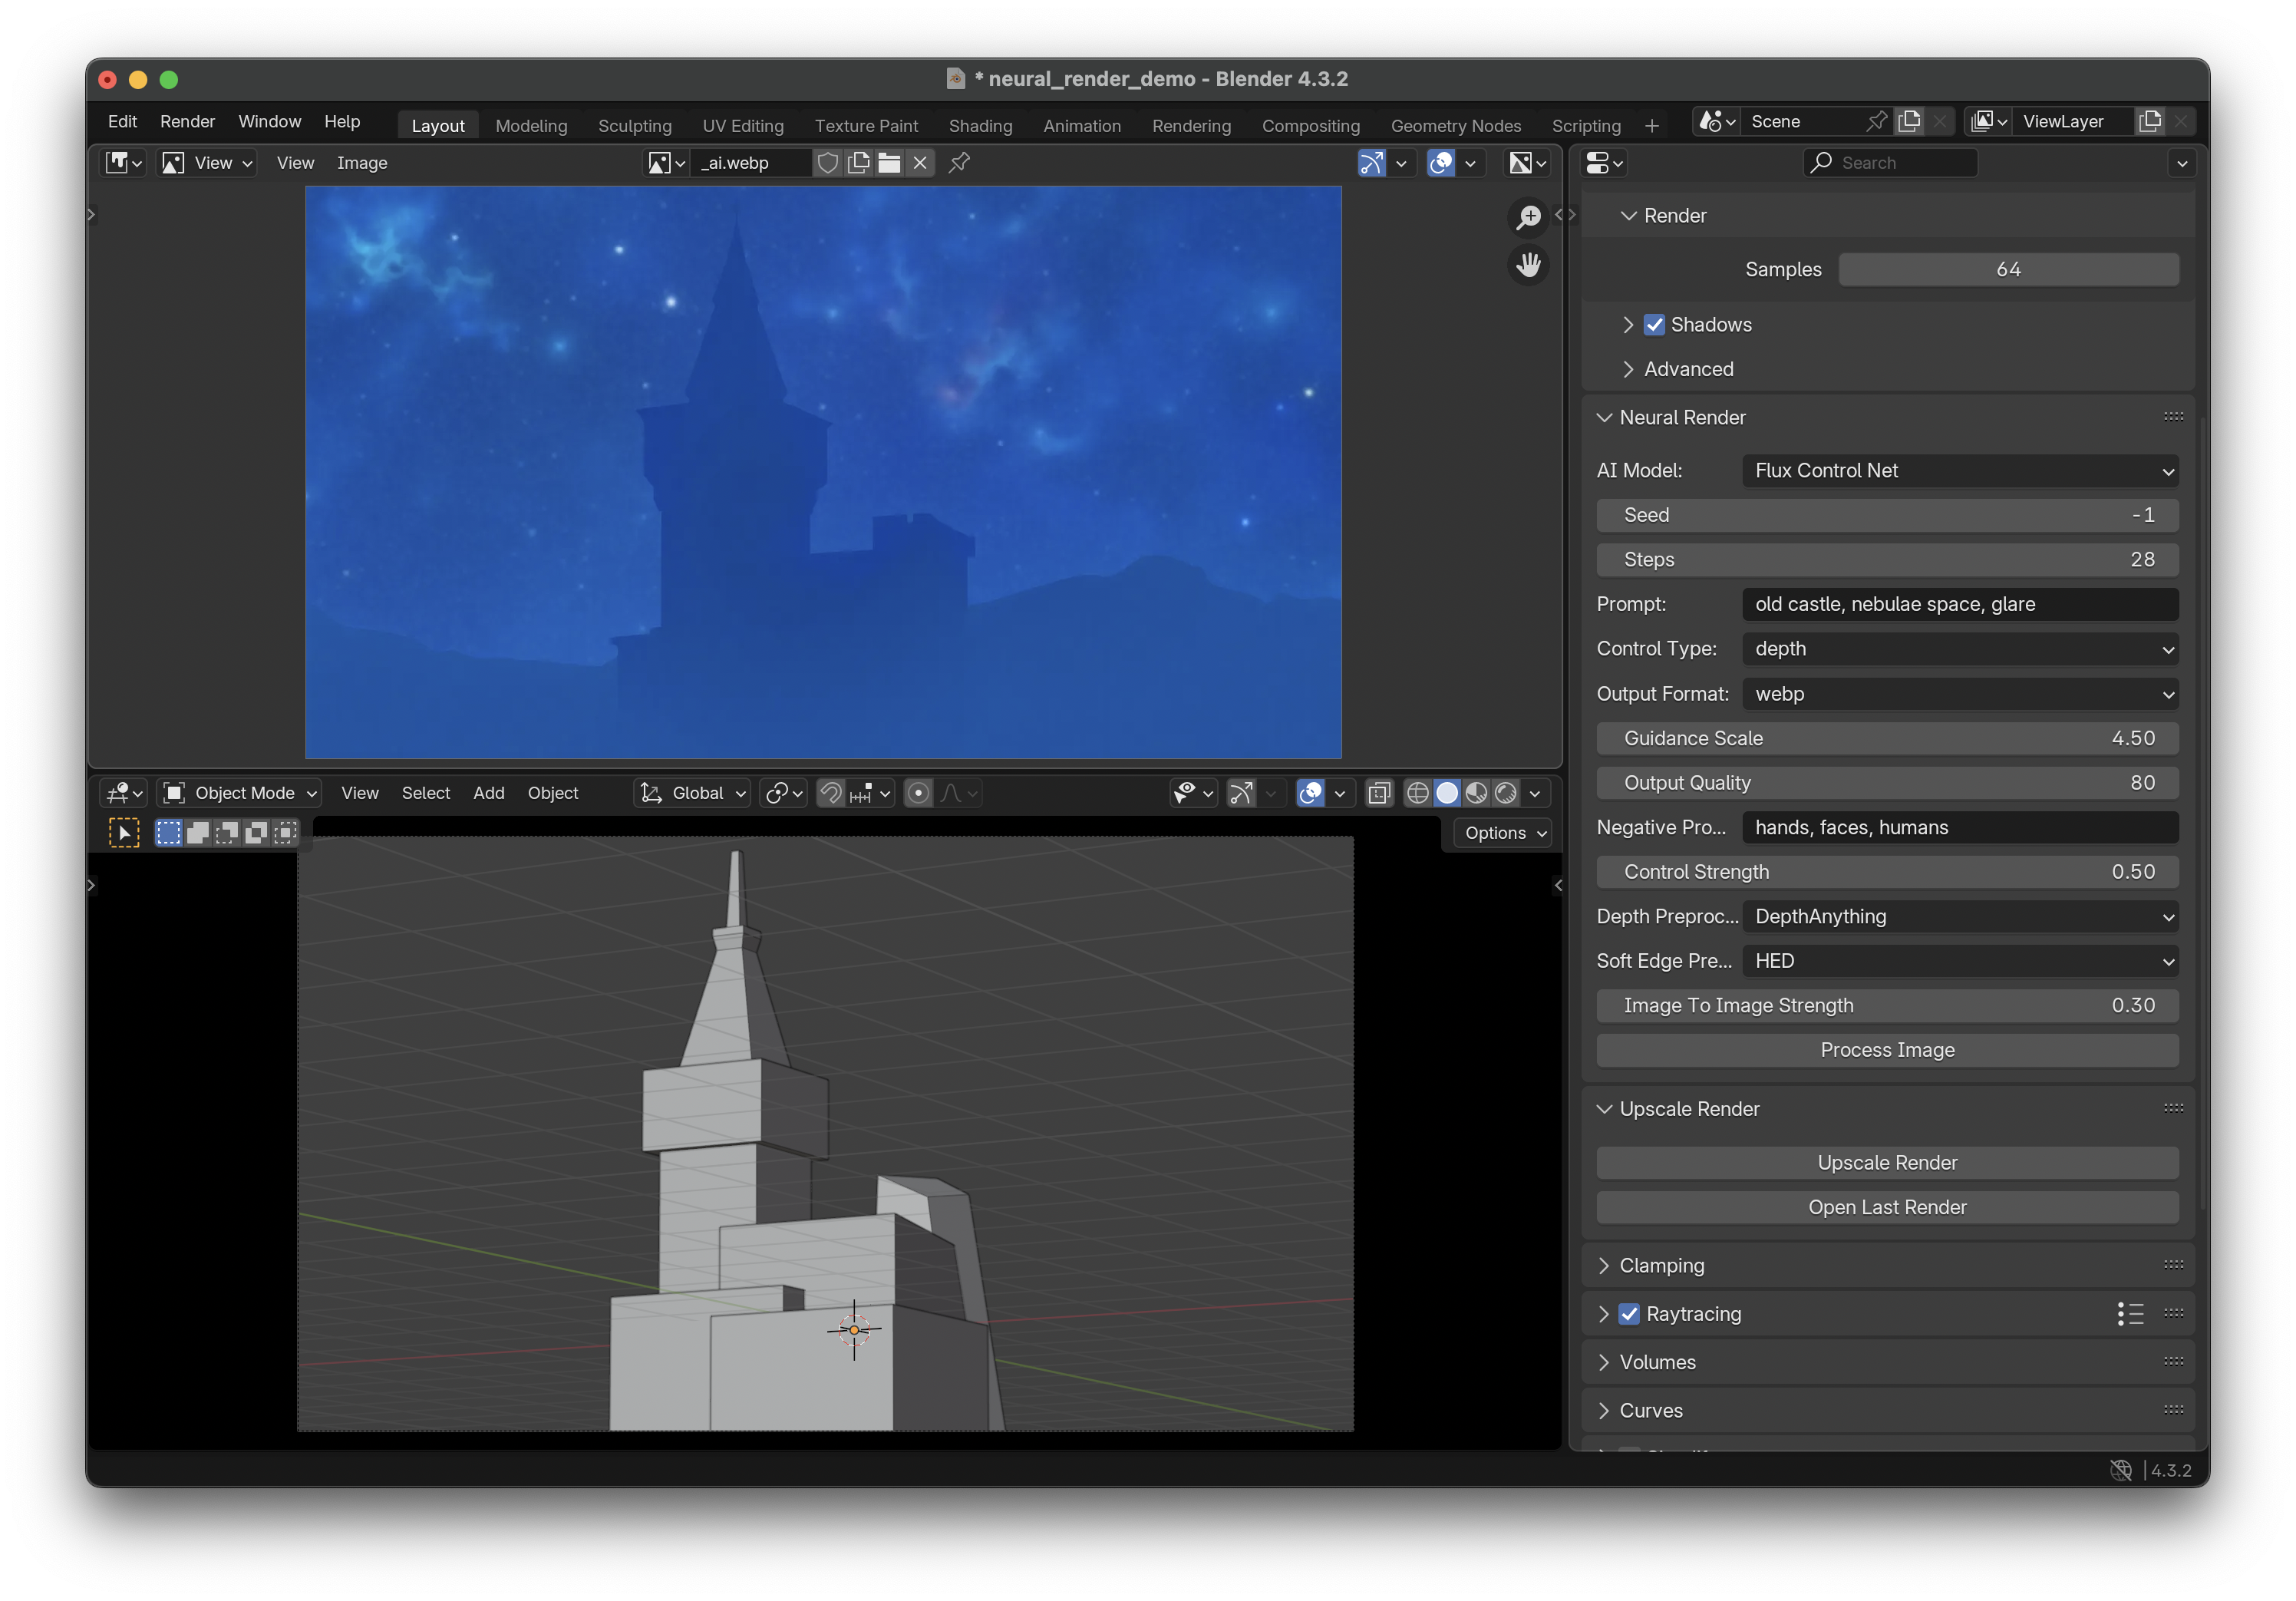
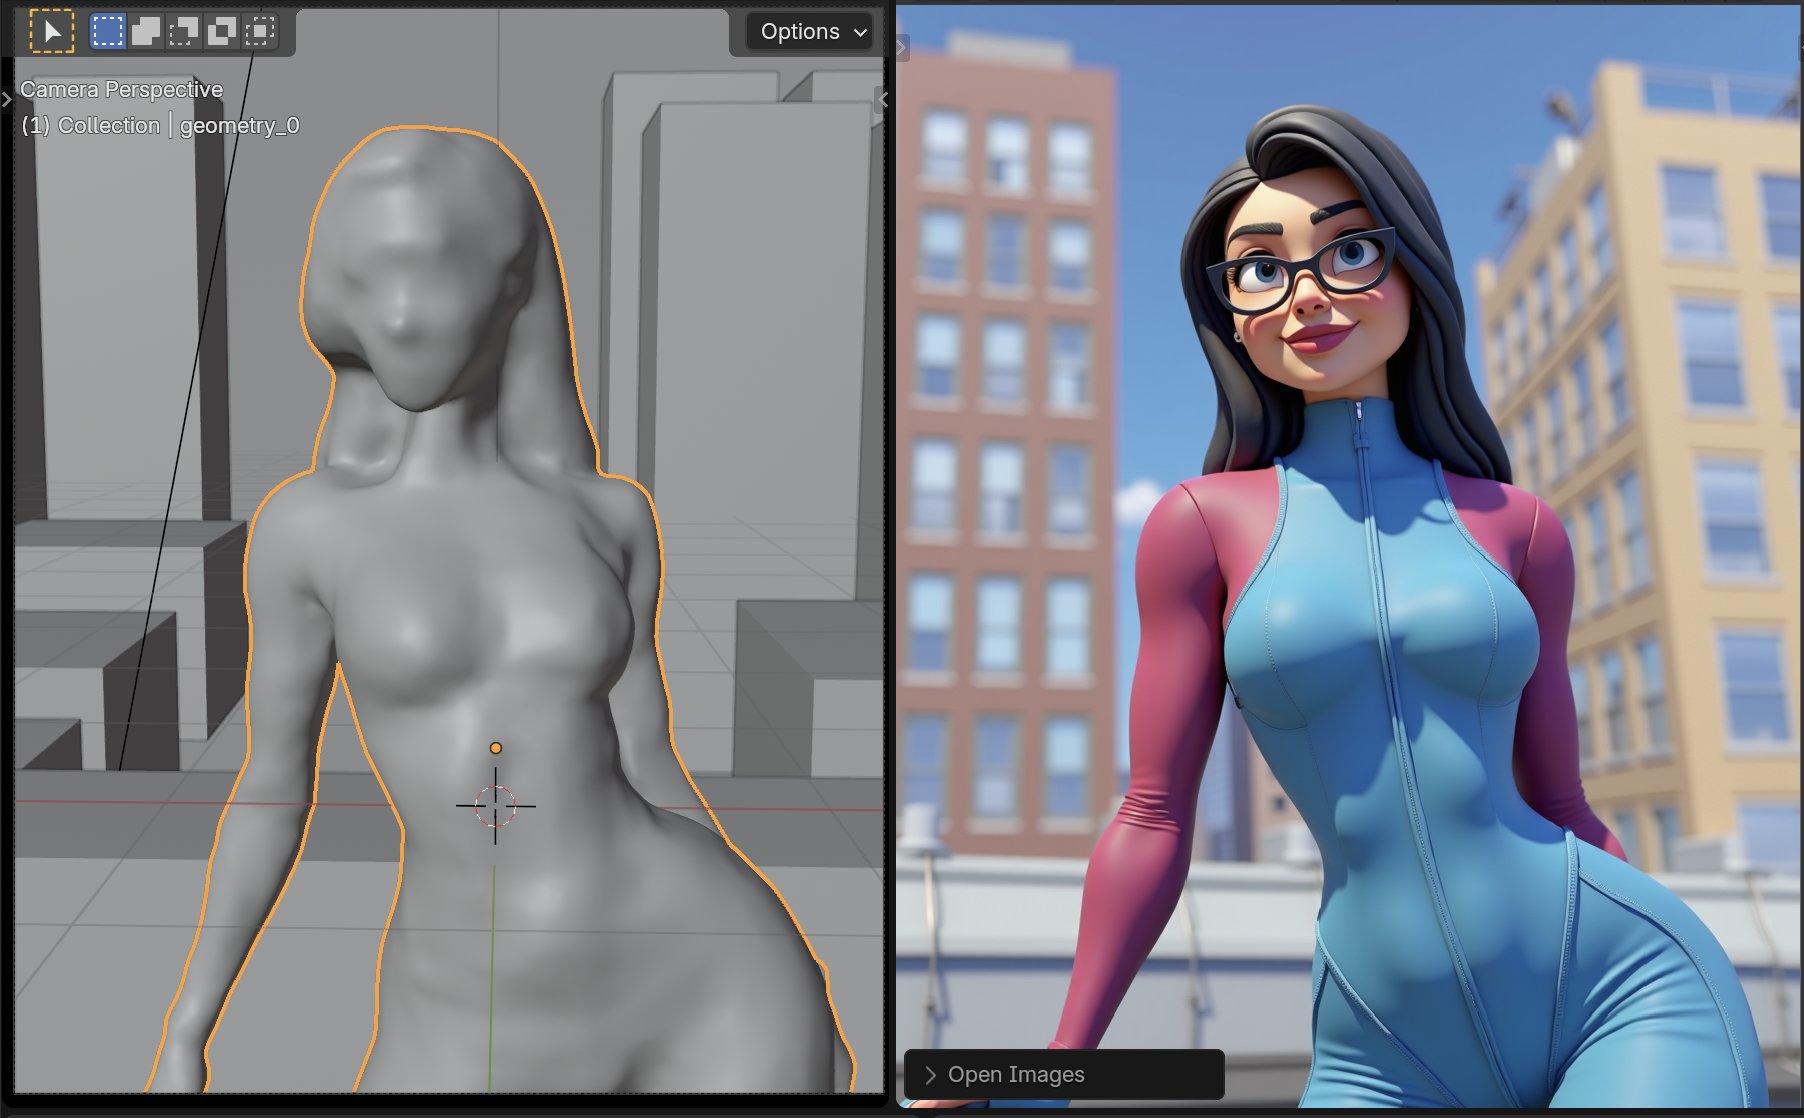
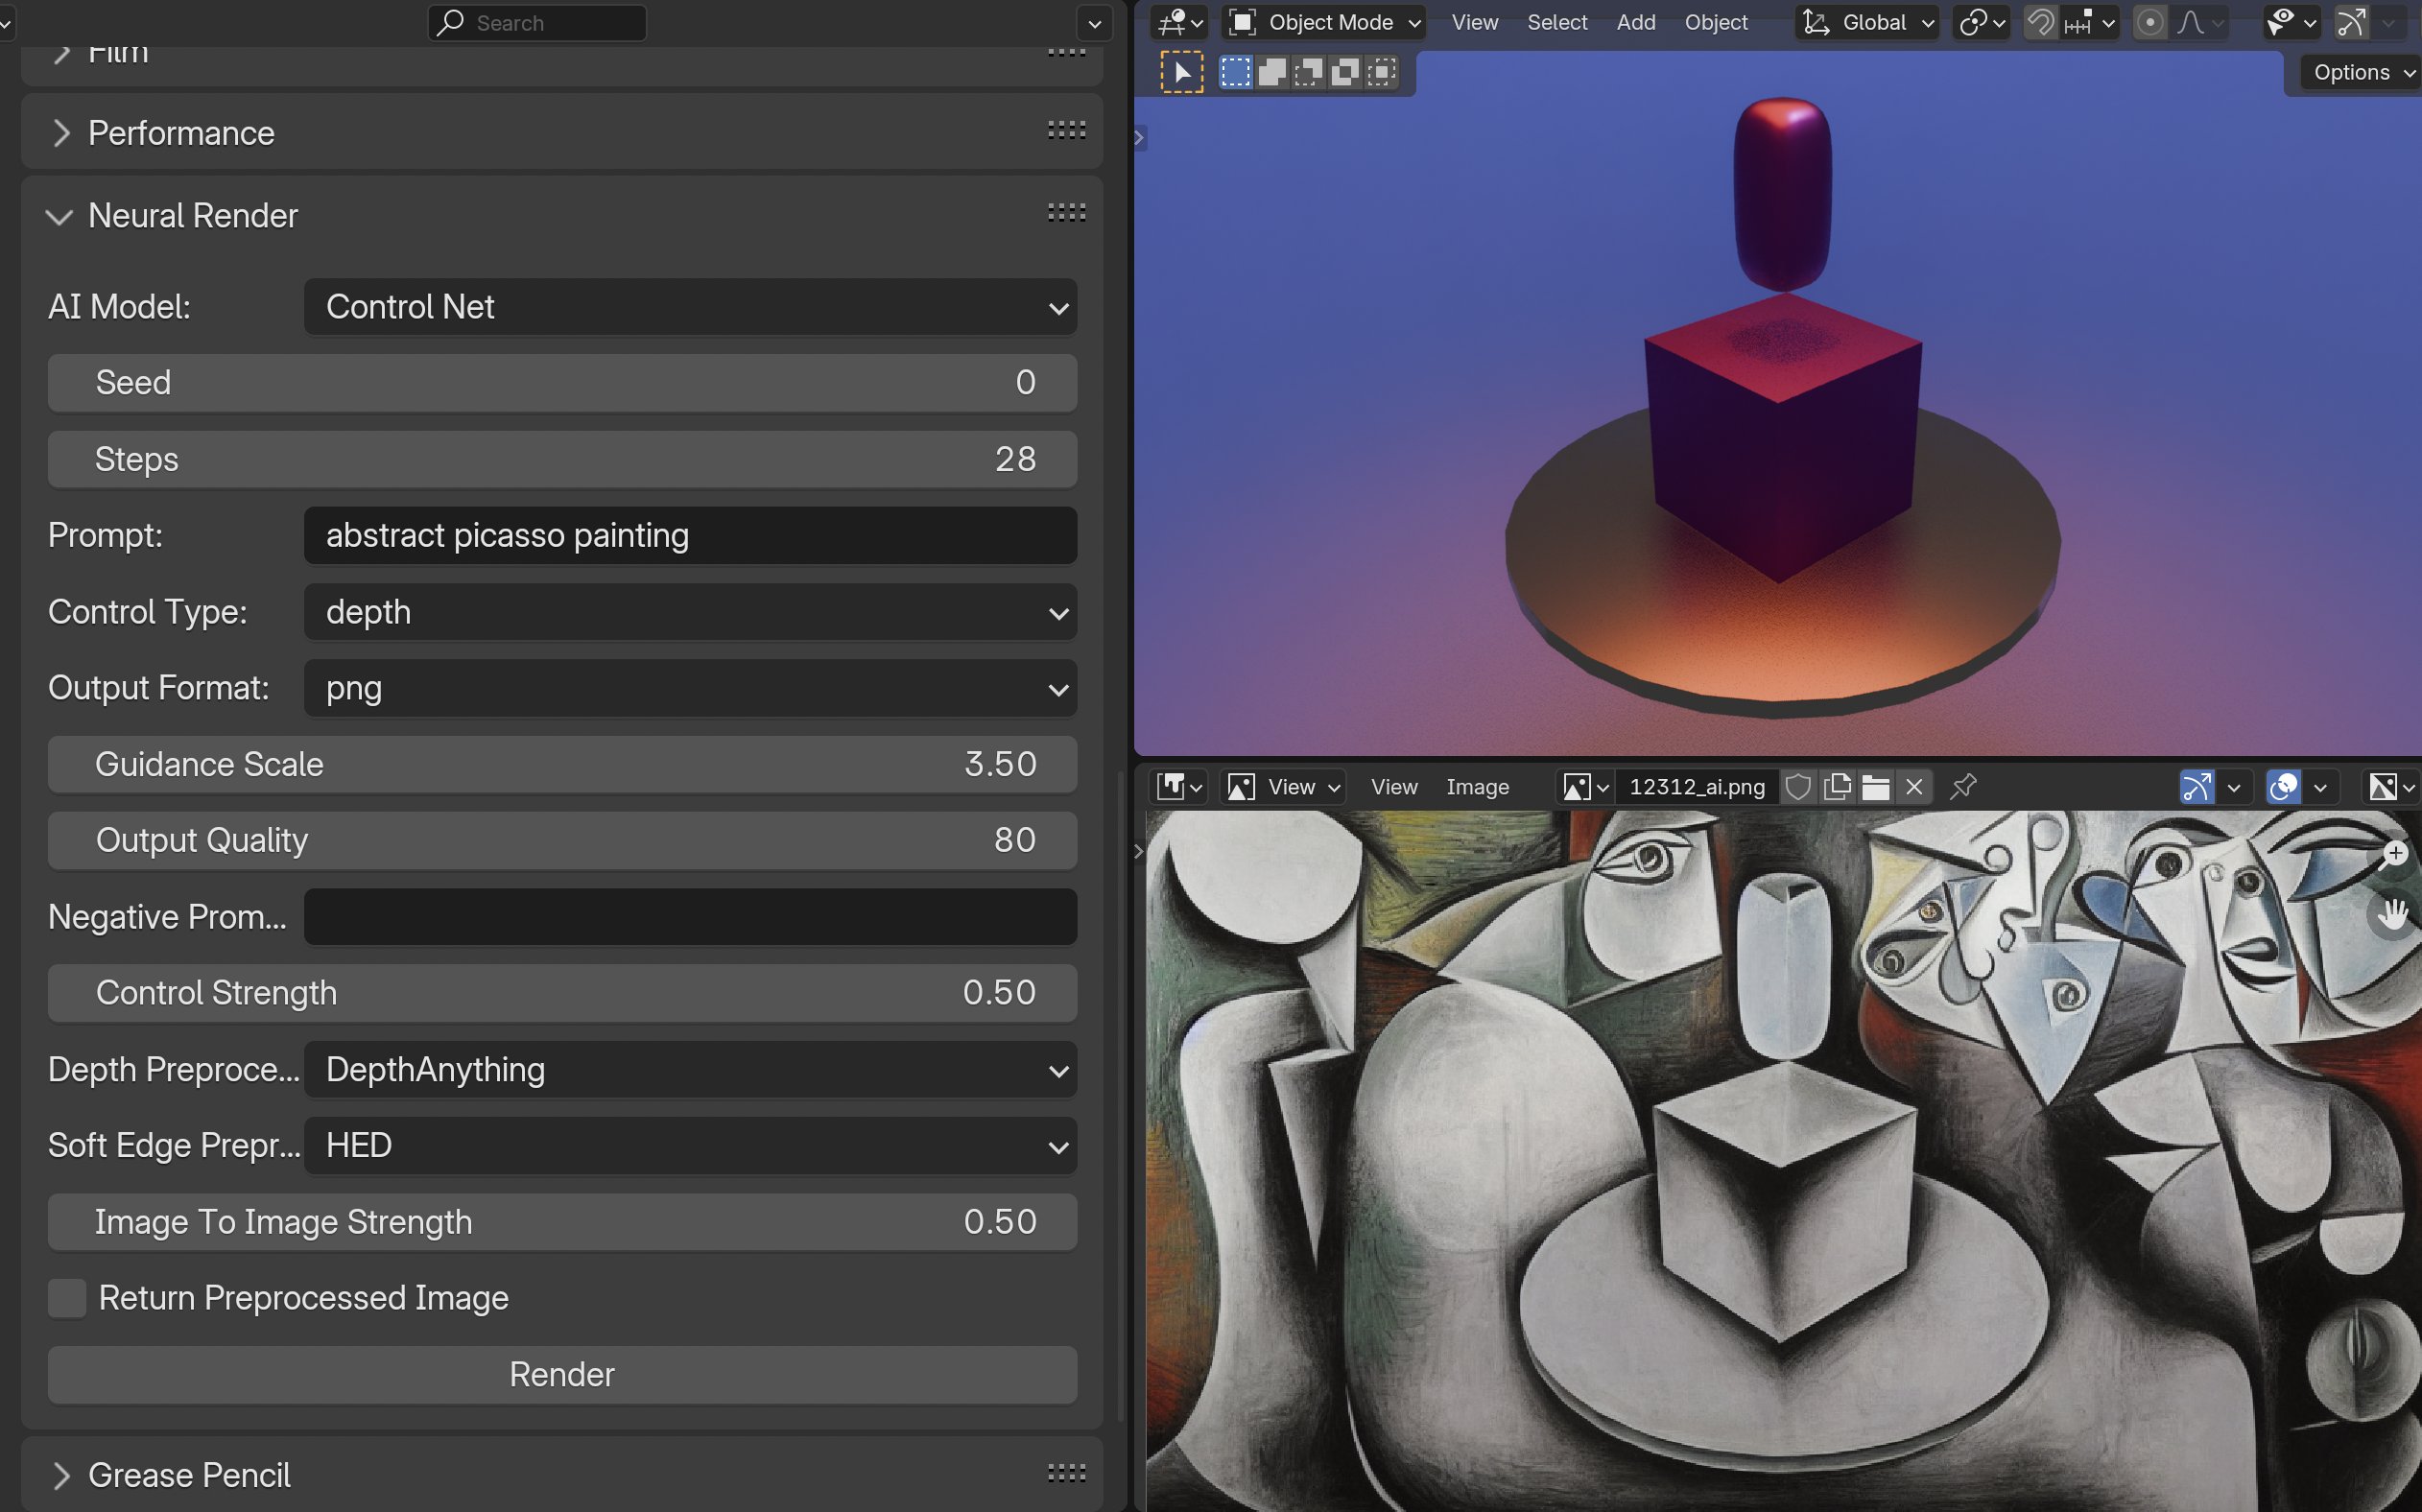
Generate new images based on your renders using Control Net
Customizable parameters for AI processing
Seamless integration with Blender's render pipeline
Support for various Stable Diffusion models and control types
Options for tiling, downscaling, and custom LoRA models
You can find the detailed instructions on how to install and use the add-on below, along with the code and necessary requirements. Be open to contributing and adding any information or examples directly into the GitHub repo.
Installation
Download the addon ZIP file
In Blender, go to Edit > Preferences > Add-ons
Click "Install" and select the downloaded ZIP file
Enable the "Render: Neural Render" addon
Usage
Set up your Replicate API key in the addon preferences
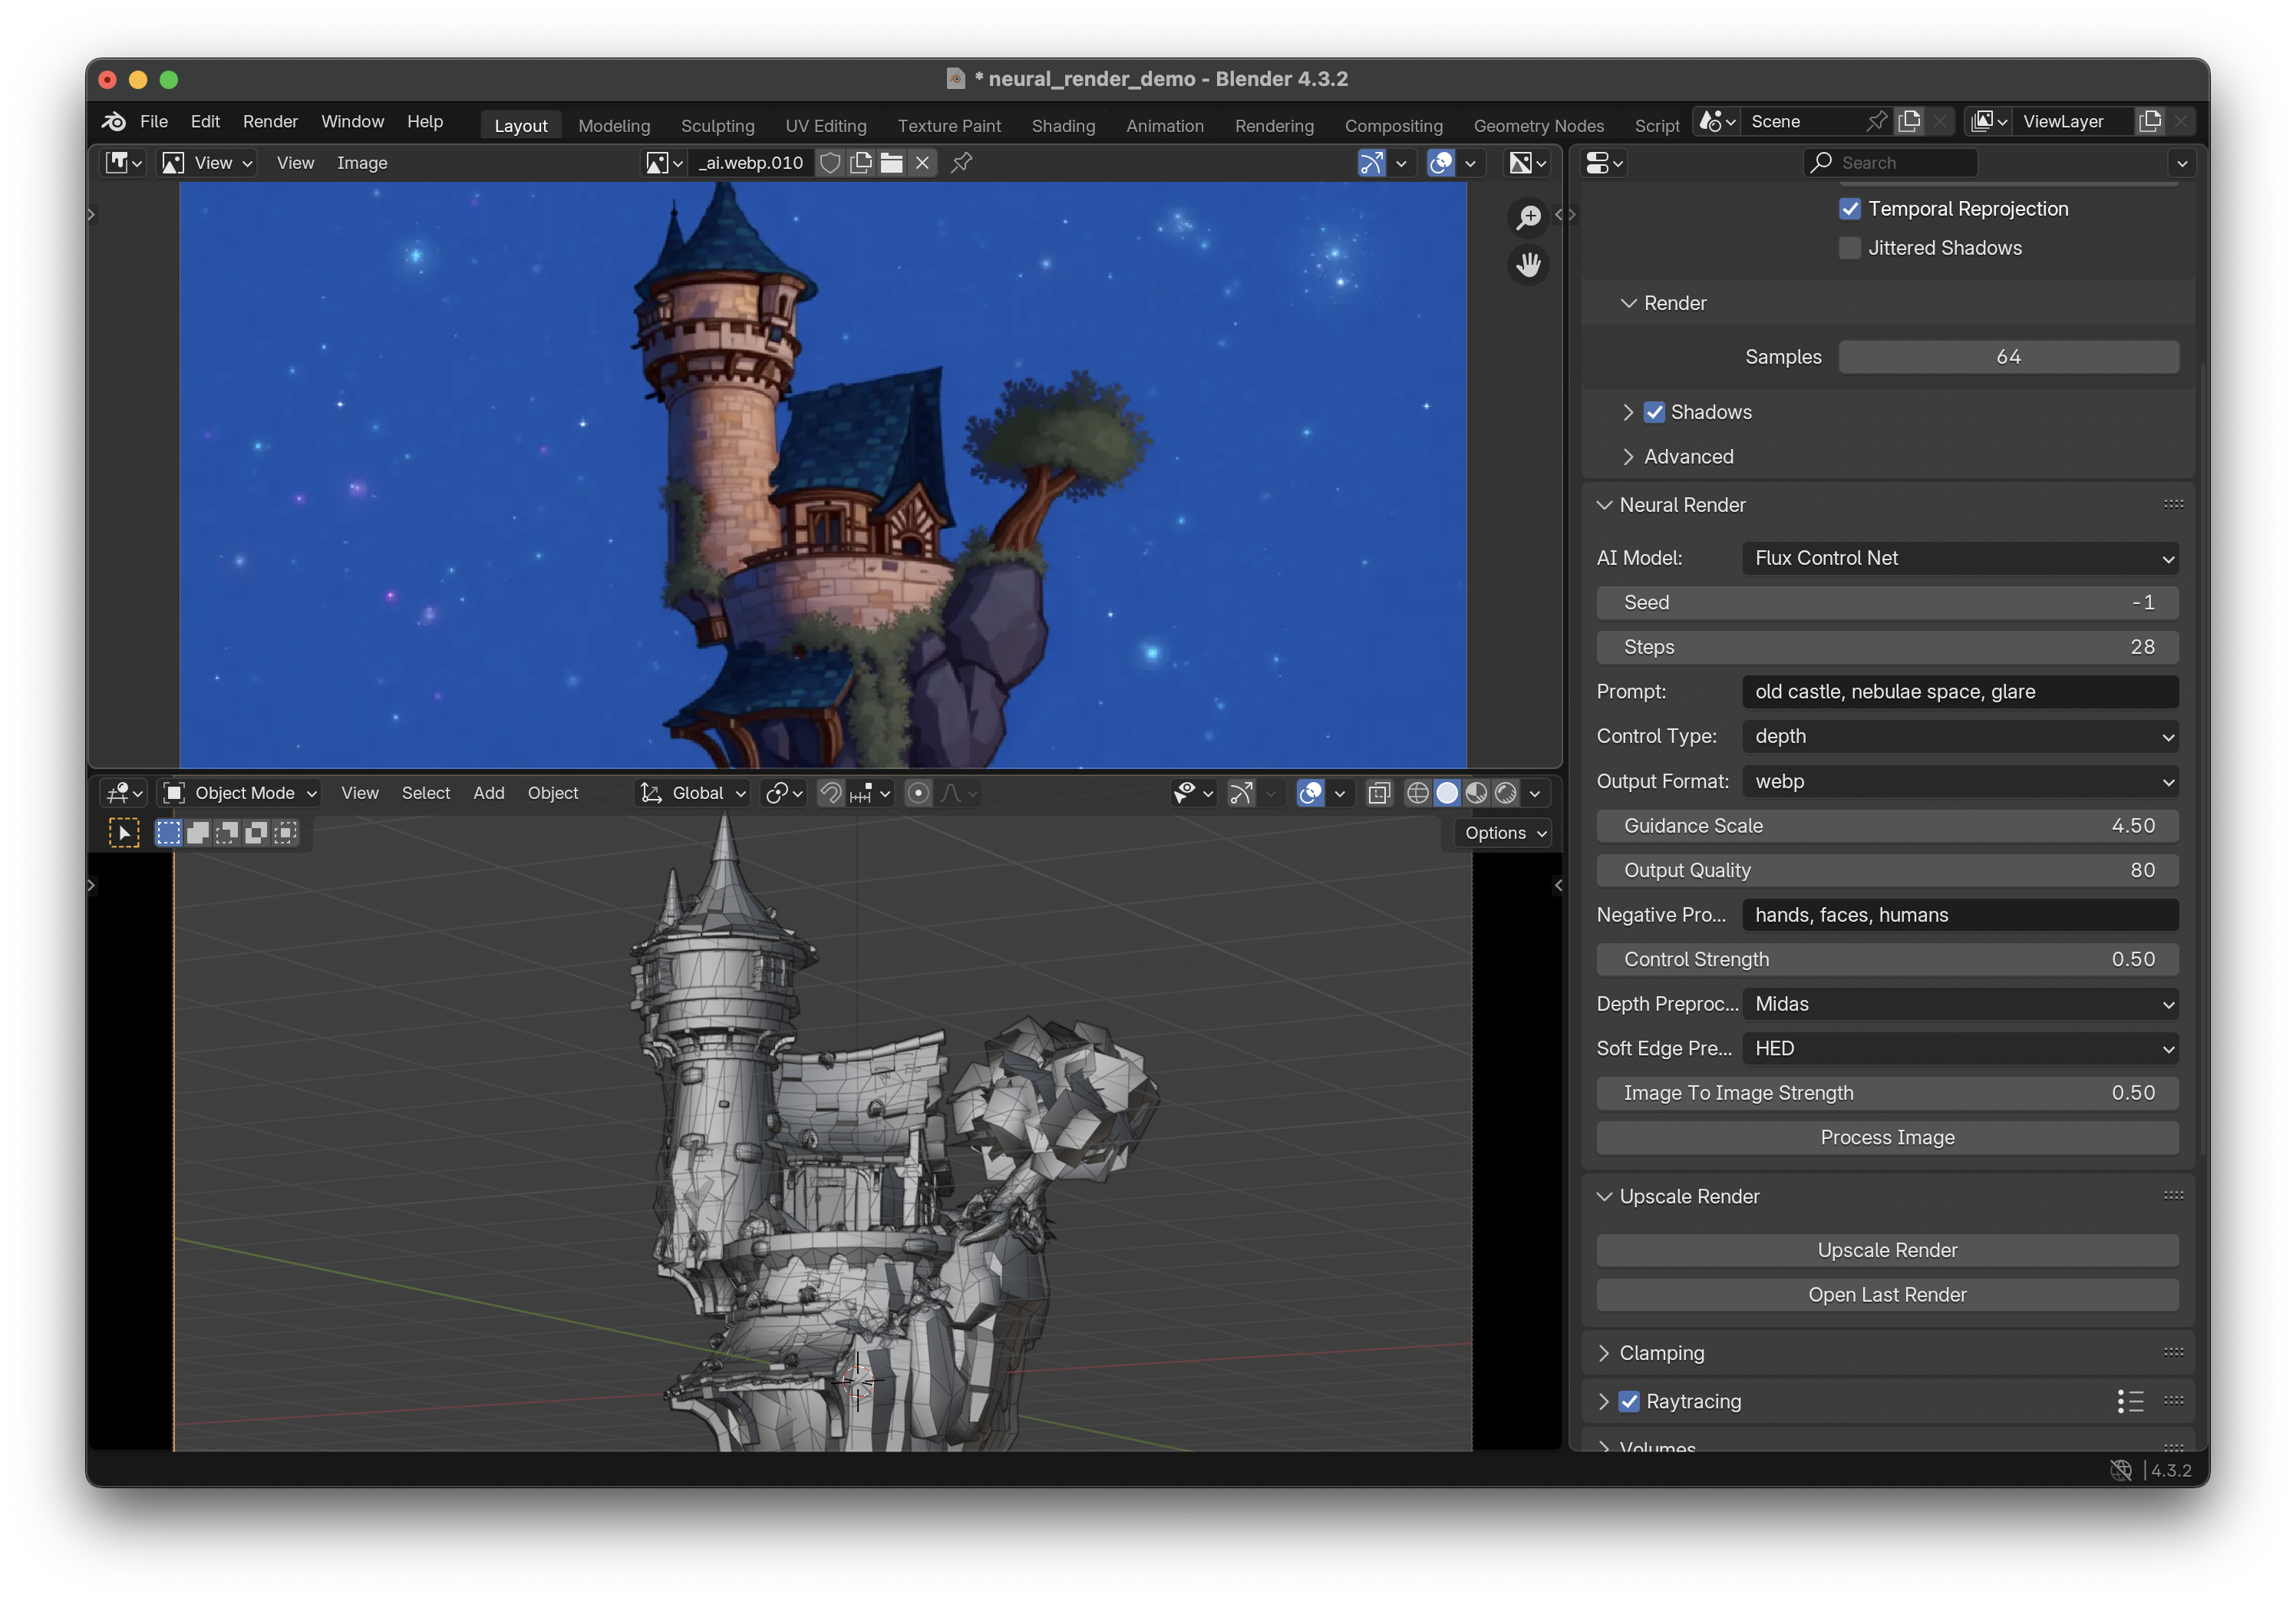
Go to the Properties panel > Render tab > Neural Render section
Choose the AI model you want to use (Clarity Upscaler or Control Net)
Adjust the AI processing parameters as needed
Click the "Neural Render" button to process your render with AI
Requirements
Blender 4.2.0 or higher
Active internet connection
Replicate account
Replicate API key
Getting Started with Replicate
Visit the Replicate website: https://replicate.com
Sign up for an account if you don't have one
Once logged in, go to your account settings
Find the API tokens section and generate a new API token
Copy this API token and keep it secure - you'll need it for the addon
Remember to never share your API token publicly. You can always generate a new token if needed.
Configuration
API Key: Enter your Replicate API key in the addon preferences
AI Model: Choose between Clarity Upscaler and Control Net
Model-specific parameters: Adjust based on the selected model
Clarity Upscaler Parameters
Positive Prompt: Describe what you want to enhance in the image
Negative Prompt: Describe what you want to avoid in the image
Seed: Set a seed for reproducible results
Steps: Number of inference steps
Scheduler: Choose the AI scheduler algorithm
Scale Factor: Set the upscaling factor
Other parameters: Adjust creativity, resemblance, tiling, etc.
Control Net Parameters
Prompt: Describe the image you want to generate
Negative Prompt: Describe what you want to avoid in the image
Seed: Set a seed for reproducible results
Steps: Number of inference steps
Control Type: Choose between canny, soft edge, or depth
Guidance Scale: Adjust the influence of the prompt
Control Strength: Set the strength of the control
Usage Recommendations and Cautions
CAUTION
Using this plugin with Replicate API may incur costs. Users are responsible for their usage and any associated charges. Carefully manage your settings to avoid high usage and costs.
Usage Recommendations
You can render very low quality without downscaling for fast speed and low pricing.
Use downscale when rendering more than 1024 pixels in size.
To keep details while downscaling, you can render up to any resolutions (2-6k), but it's very important to use downscale to maintain details while saving usage and costs.
If using a scale factor more than 2, make sure your rendered images have low resolution.
Useful Tips
Change the seed to diversify your generation.
Lower creativity and resemblance values will only upscale/enhance your render. For creative outputs, try increasing these numbers and don't hesitate to experiment.
Installation Tip
If you encounter issues with missing dependencies when installing the addon, you can manually install the required packages. Here's how:
Method 1 (Works for Mac, may work for some Windows setups):
Open Blender's Script Editor
Create a new text file
Paste and run the following Python code:
import sys
import subprocess
subprocess.check_call([sys.executable, '-m', 'pip', 'install', 'replicate'])
Restart Blender
Try enabling the Neural Render addon again
Method 2 (Alternative for Windows users):
If Method 1 doesn't work on your Windows system, follow these steps:
Locate your Blender installation folder. It's typically in:
C:\Program Files\Blender Foundation\Blender 4.2Open Windows File Explorer and navigate to this folder
In the address bar at the top, type
cmdand press Enter. This will open a Command Prompt window in the Blender folderIn the Command Prompt, type the following command and press Enter:
4.2\python\bin\python.exe -m pip install replicateWait for the installation to complete. You should see a success message
Close the Command Prompt and restart Blender
Try enabling the Neural Render addon again
These methods should install the necessary 'replicate' package in Blender's Python environment. If you're still experiencing issues, please check our GitHub repository for the most up-to-date troubleshooting tips.
Parameter Descriptions
Positive Prompt: Describe what you want to enhance or add to the image.
Negative Prompt: Describe what you want to avoid or remove from the image.
Seed: Set a seed for reproducible results (0 means random).
Steps: Number of inference steps (higher values may produce better quality but take longer).
Scheduler: Choose the AI scheduler algorithm for the diffusion process.
Scale Factor: Set the upscaling factor for the image.
Dynamic: Adjusts the HDR effect, try values from 3 to 9.
Creativity: Controls the level of creative interpretation, try values from 0.3 to 0.9.
Resemblance: Determines how closely the output resembles the input, try values from 0.3 to 1.6.
Tiling Width/Height: Affects the fractality of the image, lower values result in higher fractality.
SD Model: Choose the Stable Diffusion model checkpoint.
Downscaling: Enable to downscale the image before upscaling (recommended for large images).
Downscaling Resolution: Set the resolution for downscaling.
LoRA Links: Add links to LoRA files for additional fine-tuning.
Custom SD Model: Provide a link to a custom Stable Diffusion model.
Sharpen: Apply sharpening to the image after upscaling.
Mask: Provide a mask image URL to preserve specific areas during upscaling.
Hand Fix: Use Clarity to fix hands in the image.
Pattern: Enable for upscaling patterns with seamless tiling.
Output Format: Choose the format for the output images (WebP, JPEG, or PNG).
Credits
Developed by Alex Nix
Powered by Replicate and the Clarity Upscaler model
Built for Blender, the free and open source 3D creation suite
Flux Control Net model by xlabs-ai
Control Net model by jagilley
Cursor AI for everything else