FFusionXL-BASE


詳細
ファイルをダウンロード
このバージョンについて
モデル説明

🌌 FFusion/FFusionXL-BASE:ONNX、DirectML、Intel OpenVINO形式で利用可能
このモデルは、FFusion/FFusionXL-BASEで提供されるdiffusersの主にトレーニング目的向けの基盤モデルです。
さらに、このモデルは推論にも重要な役割を果たし、当社のLoRA抽出のベンチマークとしても機能します。
🌟 概要
🚀 高速トレーニング:高速トレーニングに最適化され、迅速な実験が可能です。
🧩 万能性:NLPからコンピュータビジョンまで、さまざまなアプリケーションと標準に対応できます。
🎓 自分のやり方でトレーニング:ご自身のニーズに合わせたモデルのトレーニングのための基盤です。
🌐 多言語対応:複数の言語でモデルをトレーニングできます。
🛡️ 堅牢なアーキテクチャ:安定性と信頼性を確保するために、実績のあるテクノロジーに基づいて構築されています。
📜 モデルの説明
FFusionXL "Base" は、トレーニングプロセスを加速することを目的とした基盤モデルです。柔軟性を重視して設計されており、さまざまな標準にわたってカスタムモデルのトレーニングの基盤として機能し、革新と効率を実現します。
トレーニング用に利用可能なフォーマット:
Safetensorチェックポイント fp16 & fp32
Diffusers(safetensors) FP16 & FP32
Diffusers(pytorch bin) FP16 & FP32
ONNX 非最適化 FP32
ONNX 最適化 FP16、DirectML対応(AMD / NVIDIA)
Intel® OpenVINO™ FP32 - 非最適化
Intel® OpenVINO™ FP16
トレーニング実施者: FFusion AI
モデルタイプ: テキストから画像を生成するディフュージョンベースのモデル
ライセンス: FFXL Research License
モデル説明: これはSDXLに基づいてトレーニングされたモデルで、テキストプロンプトに基づいて画像を生成・修正できます。このモデルは潜在的ディフュージョンモデルであり、2つの固定された事前学習済みテキストエンコーダー(OpenCLIP-ViT/G および CLIP-ViT/L)を使用しています。
詳細情報のリソース: arXivのSDXL論文。
📊 モデルのソース

目次
📜 Part 003: 🧨 Model Diffusers、高速LoRa読み込み、トレーニング 1. 📌 Model Diffusers:FFusion/FFusionXL-BASEの力を引き出す 2. 📌 依存関係のインストール 3. 📌 トレーニング 4. 📌 推論 5. 📌 トレーニング 6. 📌 テキストエンコーダーとUNetのファインチューニング 7. 📌 推論
### 📌 ONNX Version

最新のDirectML Execution Providerに完全対応した最適化済みMicrosoft ONNX版を発表します。すべてのONNXファイルは、高速な推論とトレーニングのためにfp16に最適化(量子化)されています。
Vae_Decoderは、以下の設定でfp32のまま保持されています:
"float16": false,
"use_gpu": true,
"keep_io_types": true,
"force_fp32_ops": ["RandomNormalLike"]
これは、黒い画面やレンダリングの破損を防ぐためです。完全なfp16 VAEデコーダーの適切な解決策が得られ次第、これを更新します。VAEエンコーダーおよびその他すべては完全に最適化されています 🤟。
当社のONNXはONNX v8を使用して最適化されています:
producer: onnxruntime.transformers 1.15.1
imports: ai.onnx v18, com.microsoft.nchwc v1, ai.onnx.ml v3, com.ms.internal.nhwc v19, ai.onnx.training v1, ai.onnx.preview.training v1, com.microsoft v1, com.microsoft.experimental v1, org.pytorch.aten v1, com.microsoft.dml v1, graph: torch_jit
🔖 ### 📌 ONNX 詳細
NETRON 詳細:
インストール
macOS:ダウンロード .dmg ファイル、または brew install --cask netron を実行
Linux:ダウンロード .AppImage ファイル、または snap install netron を実行
Windows:ダウンロード .exe インストーラー、または winget install -s winget netron を実行
-- NETRON ブラウザ版:テキストエンコーダーの開始
--NETRON ブラウザ版:テキストエンコーダー2の開始
--NETRON ブラウザ版:VAEデコーダーの開始
--NETRON ブラウザ版:VAEエンコーダーの開始
--NETRON ブラウザ版:UNetの開始
🔖 ### 📌 AMD による Microsoft® DirectML の Stable Diffusion 対応

AMDは、Microsoftと協力して、AMDデバイスでの最適なパフォーマンスを実現するための、Stable Diffusion向けMicrosoft DirectML最適化のサポートをリリースしました。
Microsoft DirectML AMD Microsoft DirectML Stable Diffusion
🔖 ### 📌 ONNX 推論手順

🔖 ### 📌 テキストから画像へ
ONNX Runtimeを使用して、ONNX Stable Diffusionモデルを読み込み、推論を実行する方法の例:
from optimum.onnxruntime import ORTStableDiffusionPipeline

model_id = "FFusion/FFusionXL-BASE"
pipeline = ORTStableDiffusionPipeline.from_pretrained(model_id)
prompt = "sailing ship in storm by Leonardo da Vinci"
images = pipeline(prompt).images
### 📌 Intel® OpenVINO™ Version
推論テストおよびトレーニング用に、変換済みのIntel® OpenVINO™モデルも含まれています。現時点で量子化および最適化は適用されていません。
### 📌 OpenVINO 推論と FFusion/FFusionXL-BASE
🔖 ### 📌 依存関係のインストール
OVStableDiffusionXLPipelineを使用する前に、diffusersとinvisible_watermarkがインストールされていることを確認してください。以下のようにライブラリをインストールできます:
pip install diffusers
pip install invisible-watermark>=0.2.0
🔖 ### 📌 テキストから画像へ
FFusion/FFusionXL-BASEのOpenVINOモデルを読み込み、OpenVINO Runtimeで推論を実行する方法の例:
from optimum.intel import OVStableDiffusionXLPipeline

model_id = "FFusion/FFusionXL-BASE"
base = OVStableDiffusionXLPipeline.from_pretrained(model_id)
prompt = "train station by Caspar David Friedrich"
image = base(prompt).images[0]
image.save("train_station.png")
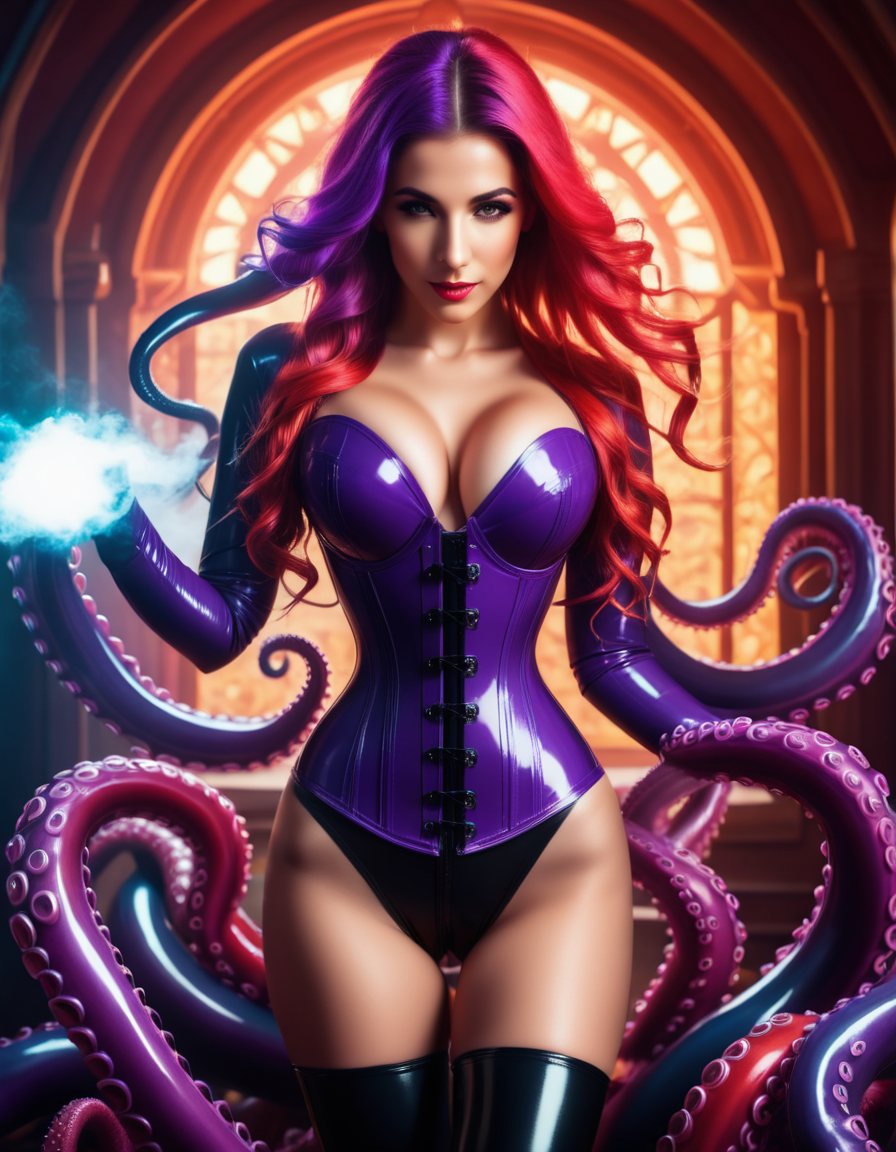
🔖 ### 📌 テキスト埋め込みによるテキストから画像へ
まず、テキスト埋め込みなしで元のパイプラインを実行します:
from optimum.intel import OVStableDiffusionXLPipeline
import numpy as np

model_id = "FFusion/FFusionXL-BASE"
prompt = "charturnerv2, multiple views of the same character in the same outfit, a character turnaround of a beautiful cyber female wearing a black corset and pink latex shirt, scifi best quality, intricate details."
np.random.seed(0)

base = OVStableDiffusionXLPipeline.from_pretrained(model_id, export=False, compile=False)
base.compile()
image1 = base(prompt, num_inference_steps=50).images[0]
image1.save("sdxl_without_textual_inversion.png")
次に、charturnerv2のテキスト埋め込みを読み込み、同じプロンプトでパイプラインを再実行します:
# Stable Diffusionパイプラインをリセット
base.clear_requests()

# テキスト埋め込みをStable Diffusionパイプラインに読み込み
base.load_textual_inversion("./charturnerv2.pt", "charturnerv2")
最初の推論前にモデルをコンパイル
base.compile() image2 = base(prompt, num_inference_steps=50).images[0] image2.save("sdxl_with_textual_inversion.png")
[****](https://cdn-uploads.huggingface.co/production/uploads/6380cf05f496d57325c12194/HocDOL_Tlxsqe9qKMRwyp.png)[****](https://cdn-uploads.huggingface.co/production/uploads/6380cf05f496d57325c12194/bkkQSPWD8Zt736eihubEi.png)[****](https://cdn-uploads.huggingface.co/production/uploads/6380cf05f496d57325c12194/oX4CWQwbuQn4WiBDbOwM6.png)
🔖 ### 📌 画像から画像へ
以下は、PyTorch の FFusion/FFusionXL-BASE モデルを読み込み、オンザフライで OpenVINO に変換し、OpenVINO Runtime を使用して画像から画像への推論を実行する例です:
from optimum.intel import OVStableDiffusionXLImg2ImgPipeline from diffusers.utils import load_image
model_id = "FFusion/FFusionXL-BASE-refiner-1.0" pipeline = OVStableDiffusionXLImg2ImgPipeline.from_pretrained(model_id, export=True)
url = "https://huggingface.co/datasets/optimum/documentation-images/resolve/main/intel/openvino/sd_xl/castle_friedrich.png" image = load_image(url).convert("RGB") prompt = "medieval castle by Caspar David Friedrich" image = pipeline(prompt, image=image).images[0] pipeline.save_pretrained("openvino-FF-xl-refiner-1.0")
🔖 ### 📌 画像出力の精緻化

画像は、`FFusion/FFusionXL-BASE-refiner-1.0` のようなモデルを利用して精緻化できます。この場合、ベースモデルから潜在変数だけを出力すれば十分です。
from optimum.intel import OVStableDiffusionXLImg2ImgPipeline
model_id = "FFusion/FFusionXL-BASE-refiner-1.0" refiner = OVStableDiffusionXLImg2ImgPipeline.from_pretrained(model_id, export=True)
image = base(prompt=prompt, output_type="latent").images[0] image = refiner(prompt=prompt, image=image[None, :]).images[0]
## 📜 パート003: 🧨 Model Diffusers、高速LoRAロードおよびトレーニング

### \### 📌 Model Diffusers: FFusion/FFusionXL-BASEの力を解き放つ

アーティスト、研究者、AI愛好家の方々のために、当モデルはスムーズでエキサイティングな体験を提供するように設計されています。diffusersを≥0.19.3にアップグレードしてください:
pip install diffusers --upgrade
さらに、`transformers`、`safetensors`、`accelerate` および非表示ウォーターマークをインストールしてください:
pip install invisible_watermark transformers accelerate safetensors
その後、以下のようにモデルを使用できます:
from diffusers import DiffusionPipeline import torch
pipe = DiffusionPipeline.from_pretrained("FFusion/FFusionXL-09-SDXL", torch_dtype=torch.float16, use_safetensors=True, variant="fp16") pipe.to("cuda")
torch < 2.0 を使用する場合
pipe.enable_xformers_memory_efficient_attention()
prompt = "An astronaut riding a green horse"
images = pipe(prompt=prompt).images[0]
## 📜 Diffusersトレーニングガイド: LoRAによるFFusion/FFusionXL-BASEのトレーニング

# Stable Diffusion XL テキストから画像へのファインチューニング

`train_text_to_image_sdxl.py` スクリプトは、独自のデータセット上でStable Diffusion XL(SDXL)をファインチューニングする方法を示しています。

🚨 このスクリプトは実験的です。このスクリプトはモデル全体をファインチューニングし、過学習やカタストロフィックな忘却などの問題が発生しやすいです。最良の結果を得るには、異なるハイパーパラメータを試すことを推奨します。🚨

## 📜 PyTorchでローカル実行

### \### 📌 依存関係のインストール

スクリプトを実行する前に、ライブラリのトレーニング依存関係をインストールしてください:

**重要**

最新バージョンの例スクリプトを正常に実行するため、**ソースからインストール**し、例スクリプトの更新に伴ってインストールを最新に保つことを強く推奨します。例スクリプトは頻繁に更新され、例固有の要件もインストールされます。このため、新しい仮想環境で次の手順を実行してください:
git clone https://github.com/huggingface/diffusers cd diffusers pip install -e .
その後、`examples/text_to_image` フォルダーに移動して以下を実行します:
pip install -r requirements_sdxl.txt
そして、[**🤗Accelerate**](https://github.com/huggingface/accelerate/) 環境を以下のように初期化します:
accelerate config
または、環境に関する質問に答えることなくデフォルトのAccelerate設定を適用する場合:
accelerate config default
または、インタラクティブシェル(例:ノートブック)が使用できない環境の場合:
from accelerate.utils import write_basic_config write_basic_config()
`accelerate config` を実行する際、torch compileモードをTrueに指定すると、大幅なスピードアップが期待できます。

### \### 📌 トレーニング
export MODEL_NAME="FFusion/FFusionXL-BASE" export VAE="madebyollin/sdxl-vae-fp16-fix" export DATASET_NAME="lambdalabs/pokemon-blip-captions"
accelerate launch train_text_to_image_sdxl.py
--pretrained_model_name_or_path=$MODEL_NAME
--pretrained_vae_model_name_or_path=$VAE
--dataset_name=$DATASET_NAME
--enable_xformers_memory_efficient_attention
--resolution=512 --center_crop --random_flip
--proportion_empty_prompts=0.2
--train_batch_size=1
--gradient_accumulation_steps=4 --gradient_checkpointing
--max_train_steps=10000
--use_8bit_adam
--learning_rate=1e-06 --lr_scheduler="constant" --lr_warmup_steps=0
--mixed_precision="fp16"
--report_to="wandb"
--validation_prompt="a cute Sundar Pichai creature" --validation_epochs 5
--checkpointing_steps=5000
--output_dir="sdxl-pokemon-model"
--push_to_hub
**注意**:

*   `train_text_to_image_sdxl.py`(diffusers/examples/text_to_image)スクリプトは、テキスト埋め込みとVAEエンコードを事前に計算し、メモリ上に保持します。`lambdalabs/pokemon-blip-captions` のような小さなデータセットでは問題ありませんが、大規模なデータセットで使用するとメモリ問題が発生する可能性があります。そのような場合、これらの事前計算された表現をディスクにシリアライズし、ファインチューニング中に読み込むことをお勧めします。詳しくは [**このPR**](https://github.com/huggingface/diffusers/pull/4505) を参照してください。

*   トレーニングスクリプトは計算量が多いため、Tesla T4のような消費者向けGPUでは実行できない場合があります。

*   上記のトレーニングコマンドは、トレーニングエポックの間に中間品質の検証を実行し、結果をWeights and Biasesにログします。`--report_to`、`--validation_prompt`、`--validation_epochs` が該当するCLI引数です。examples/text_to_image

### \### 📌 推論
from diffusers import DiffusionPipeline import torch
model_path = "FFusion/FFusionXL-BASE" # <-- 新しくトレーニングしたモデルに変更してください pipe = DiffusionPipeline.from_pretrained(model_path, torch_dtype=torch.float16) pipe.to("cuda")
prompt = "A pokemon with green eyes and red legs." image = pipe(prompt, num_inference_steps=30, guidance_scale=7.5).images[0] image.save("pokemon.png")
## 📜 Stable Diffusion XL(SDXL)のLoRAトレーニング例

Large Language Modelsの低ランク適応(LoRA)は、Microsoftが _Edward J. Hu, Yelong Shen, Phillip Wallis, Zeyuan Allen-Zhu, Yuanzhi Li, Shean Wang, Lu Wang, Weizhu Chen_ によって [**LoRA: Low-Rank Adaptation of Large Language Models**](https://arxiv.org/abs/2106.09685) で初めて導入しました。

簡単に言うと、LoRAは既存の重みにランク分解行列のペアを追加し、**新たに追加された重みだけをトレーニング**することで、事前学習済みモデルを適応させます。これにはいくつかの利点があります:

*   事前学習済みの重みは固定されたままなので、[**カタストロフィックな忘却**](https://www.pnas.org/doi/10.1073/pnas.1611835114) のリスクが低減されます。

*   ランク分解行列は元のモデルに比べてパラメータが大幅に少なく、トレーニング済みLoRA重みは簡単に移動可能です。

*   LoRAアテンションレイヤーは、`scale` パラメータを通じて、モデルを新しいトレーニング画像にどれだけ適応させるかを制御できます。

[**cloneofsimo**](https://github.com/cloneofsimo) が、人気のある [**lora**](https://github.com/cloneofsimo/lora) GitHubリポジトリで、Stable DiffusionへのLoRAトレーニングを最初に試しました。

LoRAを用いると、Tesla T4、Tesla V100のような消費者向けGPU上で、カスタム画像・キャプション対データセットでStable Diffusionをファインチューニングできます。

### \### 📌 トレーニング

まず、[**インストールセクション**](https://huggingface.co/FFusion/FFusionXL-BASE#installing-the-dependencies) で説明されているように開発環境をセットアップしてください。`MODEL_NAME` および `DATASET_NAME` の環境変数を設定してください。ここでは、[**Stable Diffusion XL 1.0-base**](https://huggingface.co/FFusion/FFusionXL-BASE) と [**Pokemonsデータセット**](https://huggingface.co/datasets/lambdalabs/pokemon-blip-captions) を使用します。

**_注:トレーニング中に定期的にサンプル画像を生成することで、トレーニングの進捗をモニタリングすることが非常に役立ちます。_** [**Weights and Biases**](https://docs.wandb.ai/quickstart) **_は、トレーニング中に画像を簡単に確認できる優れたソリューションです。トレーニング前に `pip install wandb` を実行するだけで、自動的に画像がログされます。_**
export MODEL_NAME="FFusion/FFusionXL-BASE" export DATASET_NAME="lambdalabs/pokemon-blip-captions"
この例では、トレーニング済みのLoRA埋め込みを直接Hubに保存したいので、ログインし、`--push_to_hub` フラグを追加する必要があります。
huggingface-cli login
ではトレーニングを開始しましょう!
accelerate launch train_text_to_image_lora_sdxl.py
--pretrained_model_name_or_path=$MODEL_NAME
--dataset_name=$DATASET_NAME --caption_column="text"
--resolution=1024 --random_flip
--train_batch_size=1
--num_train_epochs=2 --checkpointing_steps=500
--learning_rate=1e-04 --lr_scheduler="constant" --lr_warmup_steps=0
--seed=42
--output_dir="sd-pokemon-model-lora-sdxl"
--validation_prompt="cute dragon creature" --report_to="wandb"
--push_to_hub
上記のコマンドは、ファインチューニングの進行中に推論も実行し、結果をWeights and Biasesにログします。

### \### 📌 テキストエンコーダとUNetのファインチューニング

スクリプトは、`unet` と一緒に `text_encoder` のファインチューニングもサポートしています。

🚨 テキストエンコーダのトレーニングには追加のメモリが必要です。

`text_encoder` と `unet` のファインチューニングを有効にするには、トレーニングスクリプトに `--train_text_encoder` 引数を渡してください:
accelerate launch train_text_to_image_lora_sdxl.py
--pretrained_model_name_or_path=$MODEL_NAME
--dataset_name=$DATASET_NAME --caption_column="text"
--resolution=1024 --random_flip
--train_batch_size=1
--num_train_epochs=2 --checkpointing_steps=500
--learning_rate=1e-04 --lr_scheduler="constant" --lr_warmup_steps=0
--seed=42
--output_dir="sd-pokemon-model-lora-sdxl-txt"
--train_text_encoder
--validation_prompt="cute dragon creature" --report_to="wandb"
--push_to_hub
### \### 📌 推論

上記のコマンドでトレーニングしたモデルの推論は、トレーニング済みLoRA重みをロードした後に `DiffusionPipeline` を使用して簡単に実行できます。LoRA重みをロードするには、この場合 `sd-pokemon-model-lora-sdxl` である `output_dir` を指定する必要があります。
from diffusers import DiffusionPipeline import torch
model_path = "takuoko/sd-pokemon-model-lora-sdxl" pipe = DiffusionPipeline.from_pretrained("FFusion/FFusionXL-BASE", torch_dtype=torch.float16) pipe.to("cuda") pipe.load_lora_weights(model_path)
prompt = "A pokemon with green eyes and red legs." image = pipe(prompt, num_inference_steps=30, guidance_scale=7.5).images[0] image.save("pokemon.png")
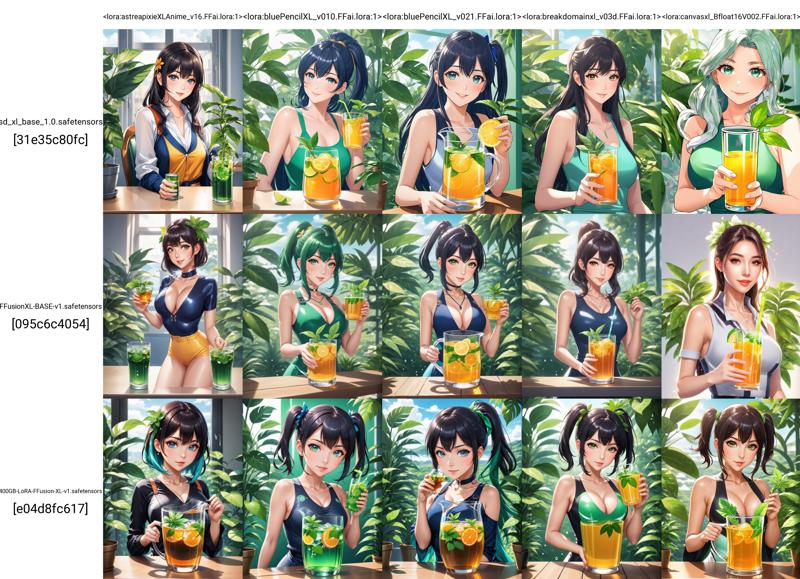
### \### 📌 評価
[****](https://cdn-uploads.huggingface.co/production/uploads/6380cf05f496d57325c12194/NPrW6dc_JsAxZrZZRDC_M.jpeg)[****](https://cdn-uploads.huggingface.co/production/uploads/6380cf05f496d57325c12194/b0Z2M7wp-MqCXes595ulX.jpeg)
[****](https://cdn-uploads.huggingface.co/production/uploads/6380cf05f496d57325c12194/m890TYI3HTk6xYMPBrLQN.png)[****](https://cdn-uploads.huggingface.co/production/uploads/6380cf05f496d57325c12194/I67ri4P06doH7l2n7x1G0.png)
この分析は、yuvalkirstain/PickScore_v1モデルを活用してFFusion.AIが実施しました。これは、Stable Diffusionモデルのプロンプト勝率と精度をテストするための継続的な研究に重要な貢献です。
📧 ご質問やサポートが必要な場合は、[**[email protected]**](mailto:[email protected]) までお気軽にお問い合わせください。あなたをあらゆるステップでサポートします!