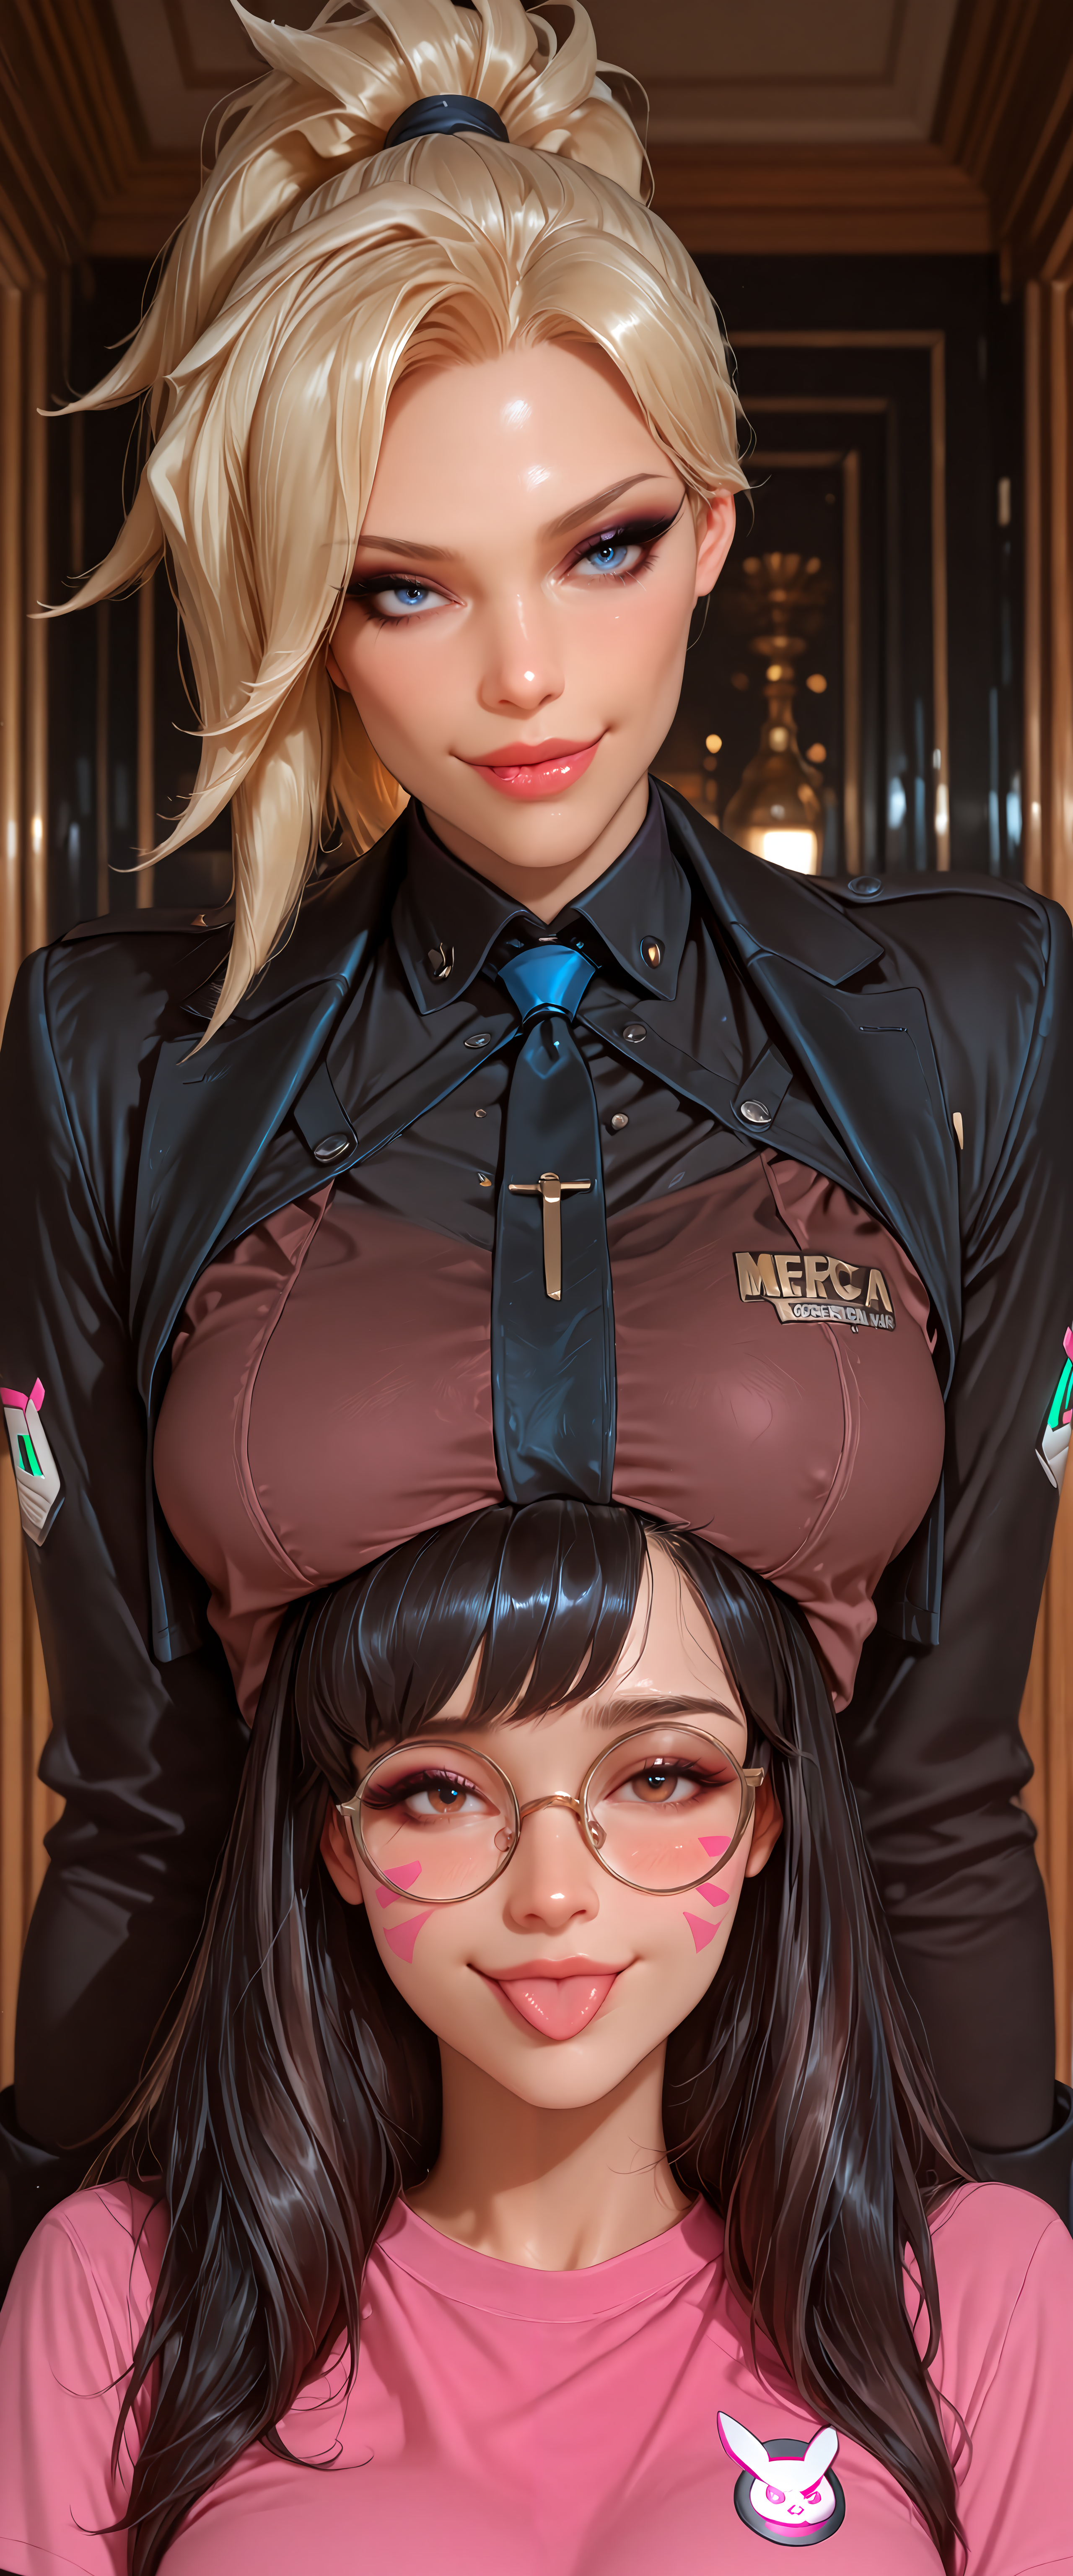
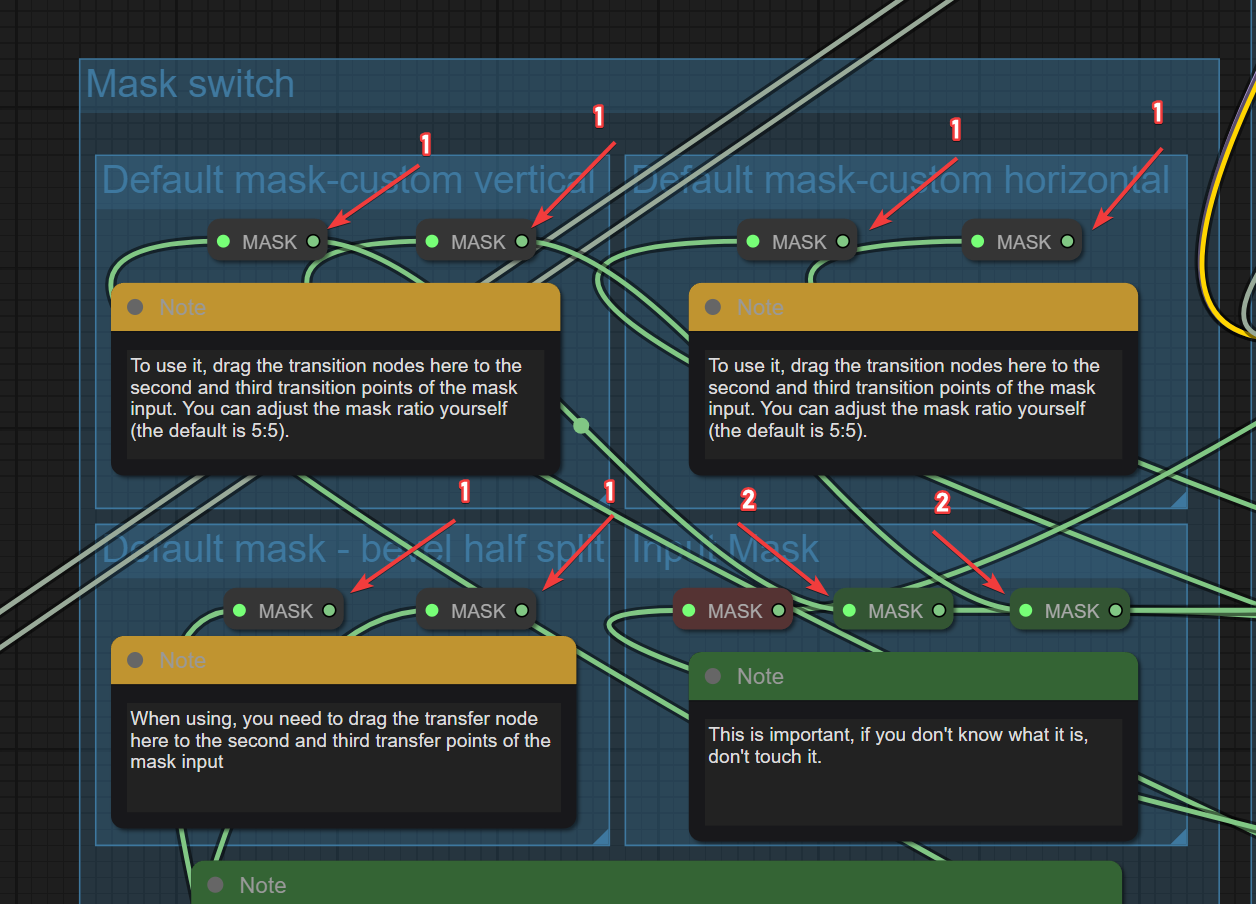
ComfyUI workflow with Regional Prompt for couple focus V3


详情
下载文件 (1)
关于此版本
模型描述
Regional prompt workflow for XL Models
This is a combination of some workflow I'v used in the past or recently.
Most of the part from the regional prompt was originally on this workflow
Huge thx to @zml_w for all the testing and the help
I'v just found that Levpat might be banned or deleted account
Upscale Method for V2 by @LevPat
https://civitai.com/models/1994653/custom-upscale-flow
USER GUIDE
https://civitai.com/articles/18257
For V3 Merged Workflow
Merged the two method into one workflow, you can now toggle between Dense Diffusion and Attention couple
Changed the detailer method, I'v kept Couple Face Detail group (for some image it's ok)
Now I'm mostly using a method from MGHerder
Found on this workflow
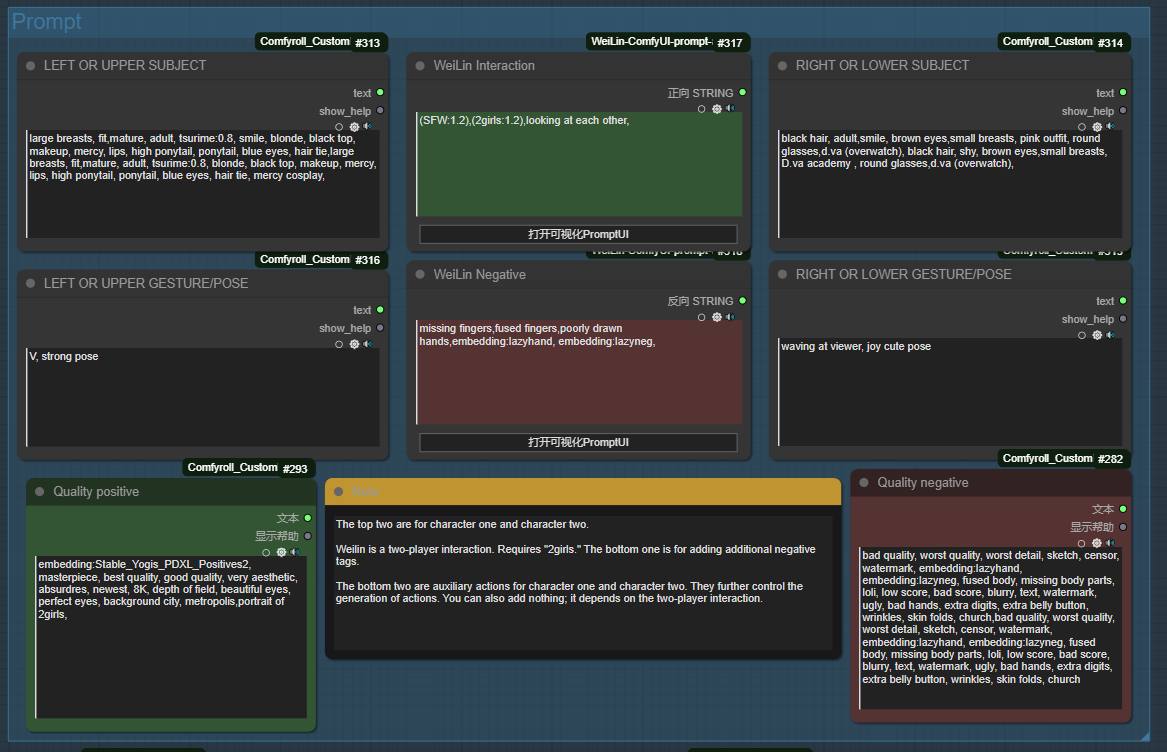
Added some settings to the Face detailer, I'v linked all the merged text prompt to the positive on the first two SEGS for each two characters, you can swicth between character (I couldn't find a good way to had wildcard or overwrite prompt on the SEGS detailer)
Added SeedVr2 upscale you will need to download the model and VAE for it to work
Added a more simple and lighter latent Upscale
I'v kept the Advanced latent upscale (was called Crazy Upscale before) linked all the text positive and negative prompt to it, converted to subgraph all the noodles
Kept the USDU upscale in some use it can be good too
Basically you have now 4 upscale method to choose with, you can delete the Upscale group you don't want it will not break the workflow.
You will need all the the custom nodes below that was used for V2 and all the following
https://github.com/numz/ComfyUI-SeedVR2_VideoUpscaler (If you want to use it)
https://github.com/mcmonkeyprojects/sd-dynamic-thresholding
https://github.com/chrisgoringe/cg-use-everywhere
https://github.com/BlenderNeko/ComfyUI_ADV_CLIP_emb
https://github.com/LAOGOU-666/Comfyui-Memory_Cleanup
https://github.com/Extraltodeus/Skimmed_CFG
https://github.com/mirabarukaso/ComfyUI_Mira
https://github.com/ltdrdata/was-node-suite-comfyui
FOR V2 Dense Diffusion and Attention Couple
I'v made two separate workflow with different Regional prompt method, both of them are in the archive if you want to try.
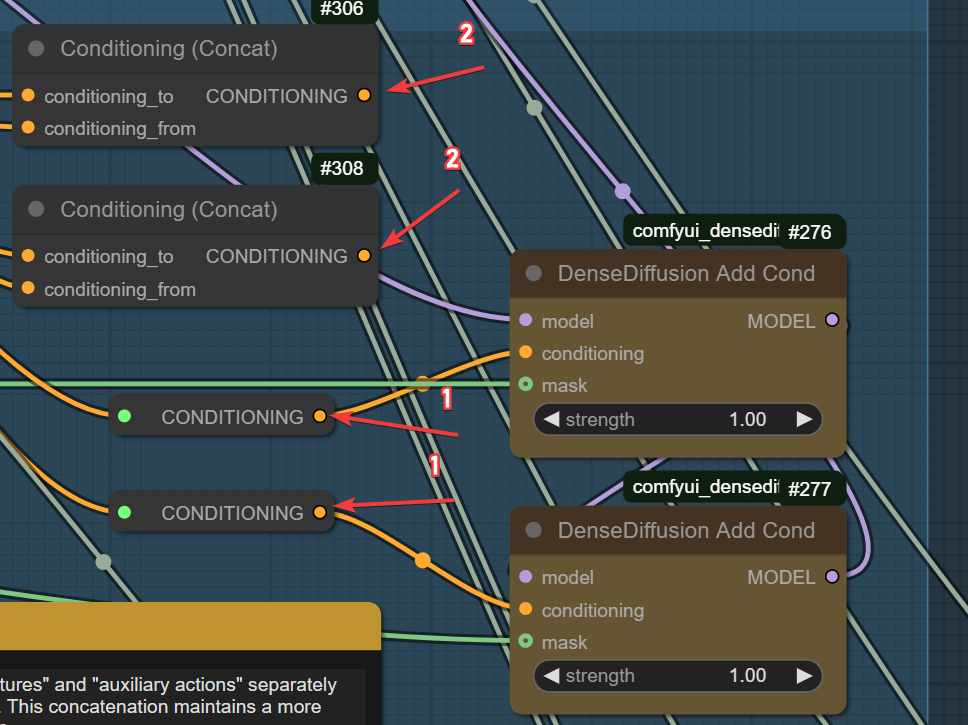
Dense Diffusion
So the error "The size of tensor a (924) must match the size of tensor b (308) at non-singleton dimension 3"
Is still here with Dense Diffusion BUT now I know 100% why it happens, so I will detail everythings how to avoid it.
First you can put almost everything in every positive prompt, a lot of detail or action for left char and almost nothing for 2nd character will not trigger this error.
The only way this error will pop is Positive VS Negative Prompt.
So why it happens then, almost exclusivly with Embedings, because of Tokens count and the way Dense Diffusion work, the size of Tokens need to be almost the same, and when you put emebeddings, like Lazyhand, Lazyneg, etc will use a lot of Tokens (more exactly tokens Chunks)
So how to avoid it, you can either not use emebeddings at all, I'v added note on the workflow with good (I think) quality prompt.
You can still use Embeddings but you wiil need to balance them between positive and Negative. So for example if you put Lazyhand + Lazyneg in Negative, you will need to use at least one or more embeddings in the positive quality to get the same size of Tokens chunks.
So because of that I'v added a custom nodes made by me (and GPT) to Normalize the negative quality, you can either turn it off or on, I'v put pics for comparaison in the archive.
If you'r not happy or don't like this method I'v made another Workflow with a different nodes called Attention couple.
Attention Couple
With Attention Couple this error will never pop, then why not using it and getting rid of Dense Diffusion ?
Attention couple work great and can have pretty good result, but in my testing I saw two major flaw with it.
First the Lora did not get applied the same way with it, Dense Diffusion seems to have a better blend for the model and loras.
Second the interaction seems more difficult too, I did not use it very extensively but the few image I'v made seems to have less prompt adherence.
Here is every nodes you will need for both
For Dense Diffusion
https://github.com/Fannovel16/comfyui_controlnet_aux
https://github.com/ltdrdata/ComfyUI-Impact-Pack
https://github.com/rgthree/rgthree-comfy
https://github.com/yolain/ComfyUI-Easy-Use
https://github.com/kijai/ComfyUI-KJNodes
https://github.com/ssitu/ComfyUI_UltimateSDUpscale
https://github.com/cubiq/ComfyUI_essentials
https://github.com/ClownsharkBatwing/RES4LYF
https://github.com/giriss/comfy-image-saver
https://github.com/shiimizu/ComfyUI_smZNodes
https://github.com/ltdrdata/ComfyUI-Impact-Subpack
https://github.com/huchenlei/ComfyUI_densediffusion
https://github.com/edelvarden/comfyui_image_metadata_extension
https://github.com/rcsaquino/comfyui-custom-nodes
https://github.com/zml-w/ComfyUI-ZML-Image
(https://github.com/zml-w/ZZZ_ZML_English_Patch)
A small custom node is in the archive for the Negative Normalization, just need to put it in custom nodes folder. No requirements needed.
For Attention Couple
Everythings above +
https://github.com/BlenderNeko/ComfyUI_ADV_CLIP_emb
https://github.com/laksjdjf/cgem156-ComfyUI
If you have trouble with FAILED IMPORT for cgem156 you can try this fix
https://github.com/laksjdjf/cgem156-ComfyUI/issues/17#issuecomment-2918745574
Worked for me with ComfyUI desktop App
Older Version
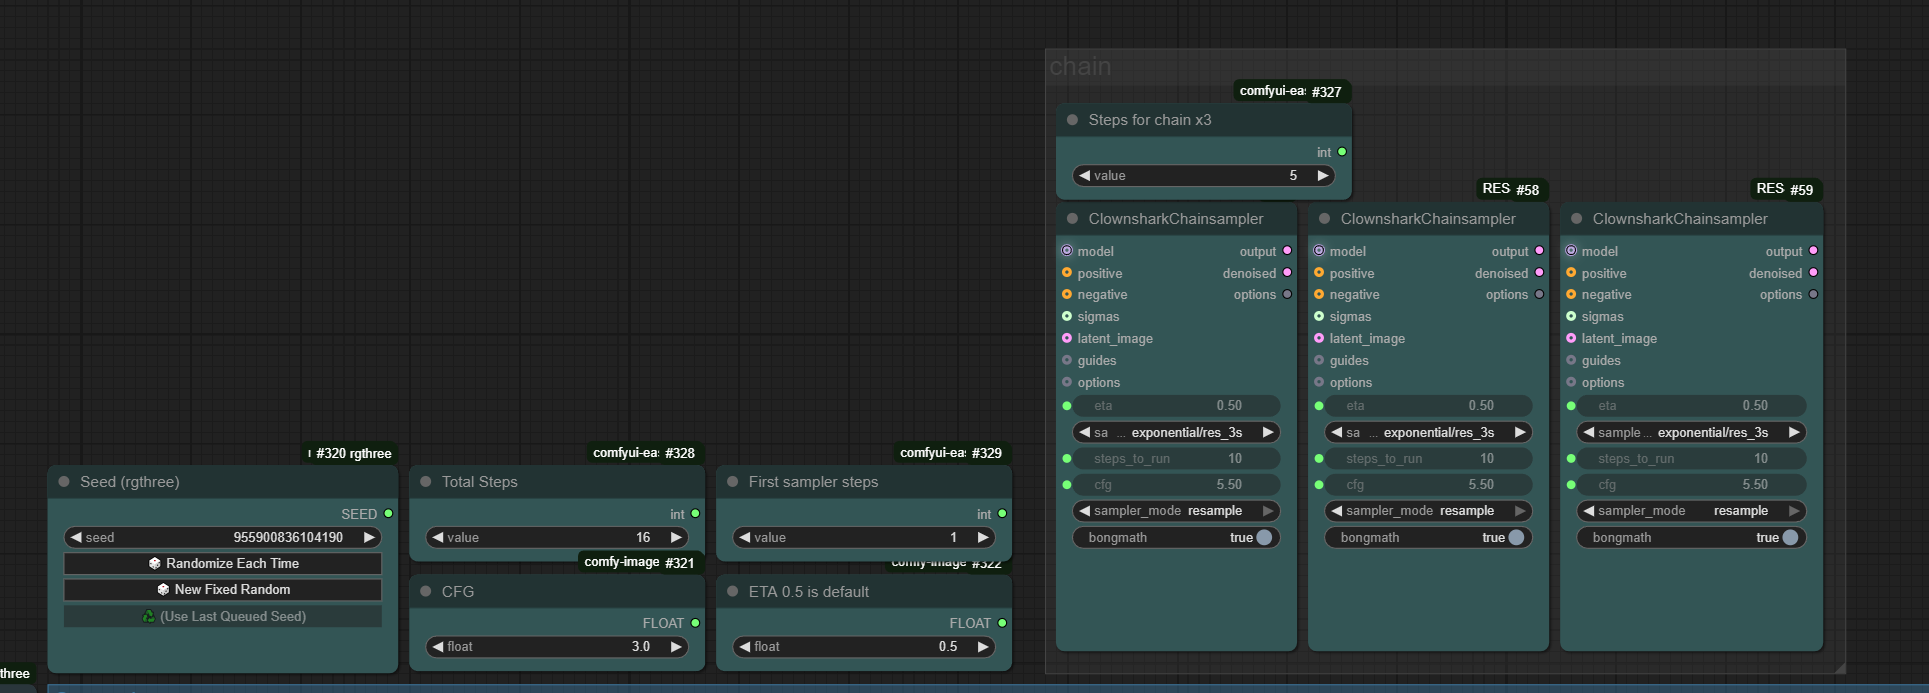
I'v added a chain sampler because I love this method, the render time and the result it gave.
This is quiet an advanced workflow so you will need a lot of custom nodes, some may not work with ComfyUI manager, I will link them here if you want to install manually.
Make sure you activate your venv environment for the requirements.txt for custom nodes.
There is a simplified version in the archive if you want to try without all the nodes for HiresFix, Face detailer, upscale and color match.
I'm not responsible if you break your ComfyUI install, some of the nodes may use different Pytorch version or requirements you already use.
https://github.com/ltdrdata/ComfyUI-Impact-Pack
https://github.com/pythongosssss/ComfyUI-Custom-Scripts
https://github.com/rgthree/rgthree-comfy
https://github.com/yolain/ComfyUI-Easy-Use
https://github.com/shadowcz007/comfyui-mixlab-nodes
https://github.com/jags111/efficiency-nodes-comfyui
https://github.com/ssitu/ComfyUI_UltimateSDUpscale
https://github.com/Suzie1/ComfyUI_Comfyroll_CustomNodes
https://github.com/cubiq/ComfyUI_essentials
https://github.com/ClownsharkBatwing/RES4LYF
https://github.com/ltdrdata/ComfyUI-Impact-Subpack
https://github.com/huchenlei/ComfyUI_densediffusion
https://github.com/edelvarden/comfyui_image_metadata_extension
https://github.com/Miosp/ComfyUI-FBCNN
https://github.com/rcsaquino/comfyui-custom-nodes
https://github.com/weilin9999/WeiLin-ComfyUI-prompt-all-in-one
Deprecated version use this one instead, I'v fixed the workflow with the new one
https://github.com/weilin9999/WeiLin-Comfyui-Tools
For V1 Multimask
https://github.com/chflame163/ComfyUI_LayerStyle
https://github.com/kijai/ComfyUI-KJNodes
https://github.com/chrisgoringe/cg-use-everywhere
https://github.com/giriss/comfy-image-saver