Wan2.2 I2V Nexus – SVI 2.0 Pro Multimodal Workflow

Details
Download Files (1)
About this version
Model description
**NEW ** SVI 2.0 Pro v1.5
This new version includes :
Integration of SVI For Loop
Apply same model for all steps
Maximum set to 10 total steps
Changing SVIProEmbed node by WanImageToVideoSVIPro
Set Seed by Index
Set LoRAs by Index
Lazy Pony NSFW image generator (Based on BoomAi workflow)
Aternative version including Grok autofill NSFW Scenario Generator (API Key needed)
What's new?

The workflow runs now in "ForLoop" mode (If you don't know how ForLoop is working, please refer to the previous versions info below). You have to Run at least 2 segments (Start group + ForLoop group with 1 total step) to have a final output.
Preparation

As usual set your inital parameters and now also your total step count (segments). Total step count is maxed to 10 but you can increase it (Refer to the LoRAs per Index section below). Keep in mind that if you generate too long videos, you won't be able to add audio and you'll have to choose between Uspcaling or Interpolation, unless you have a shitload of RAM, you won't be able to apply both treatments without getting an OOM (The workflow is currently running without Chunking system for long sequences, will be added on the next update).

Choose your enhancements, choose between GGUF or Safetensor VAE by bypassing the node you don't use. You can now choose between using GGUF models or Safetensor models by toggling the "Switch" button. True will use the GGUF models, False will use the Safetensor models.
The LoRAs Loaders in this section are applied to all index including the start group. You will mostly use your SVI, Lightnings LoRAs and LoRAs for the "START" group here.
Grok autofill NSFW Scenario Generator (ALT Ver.)

In my almighty lazyness, I made an NSFW Scenario Generator powered by Grok. YOU NEED AN XAI API KEY. The API key cost at least 25$ but you'll have plenty of use (I'm using it since a month and still have 22$ credit, every info is on Xai about pricing and models available). If the node is not updated and you want to use the last Grok's model, you'll have to edit the node file in your custom node folder to add the model to the list (It's quite easy, be sure to respect the same spelling Xai is using on the models page).
So bascially this is working by giving the inital image to JoyCaption using Llama 3.1 8B - Lexi model (Auto download by the node and NSFW capable) who will describe the image to grok (you can modify the image description parameters in the Subgraph). The "reference_image" input of WAN2.2 Prompt Studio was not working at the time, I don't know if it's working now.
Once the image is described, Grok will automatically create a scenario based on your request ("Ask what you want" textbox). Once the scenario is created, it is automatically sent and structured in each corresponding index, including the "Start group". You simply don't have to do anything; everything is automated.
The "Debug" node preview the full scenario created and the "Settings" node give you technical informations.
LoRAs and Seed by index

As the previous I2V ForLoop system, you'll set wich LoRa is used on wich Index ( !! "START" group only depends on the LoRA loader in "Models & LoRas For All" group).
If you want to increase the maximum total step count, you have to duplicate the last line (Lora High and Low + Seed) and connect it to the corresponding Any Switch Index. If you go further 10 total step count without doing this, you will have an error at the end of generation and no output.
Start group

This start group is basically the first sequence, write your prompt (it's auto-translated, for those who prefer to prompt in their native language). This group is outside the Loop. You'll find the seed of this group inside it. You'll find two video preview, one in 16fps and the other in 24fps for comparison, and a preview of the first and last image of the sequence to check any degradation.
ForLoop group

This group is where the loop operates. Each step is one Index (starting at index 0 - Please refer to previous version if you don't know how ForLoop system works). You'll have a preview for the current index scenario and a second one below for the complete scenario by index.
You'll find the "Inferences" group subgraph here where are located the samplers and everything related to SVI and ForLoop. You can change the samplers and schedulers directly on the subgraph node.
Pony NSFW RIG - Based on BoomAi workflow

Mainly using this to generate NSFW images, I integrated it in the Nexus and did some modifications.
Selections

This is a basic system using wildcards, make your selection and have fun ! (Results may vary depending on selections, be coherent).
Selections

Here choose your model. Be aware that the system is intended for models with Baked In VAE, if you want to use a model without VAE you'll need to add a VAE Loader and connect it to the "Generation" group subgraph.
If you want to generate Futanari or Gay content, select the "Futa Negative" prompt adapted to this kind of content.
Add LoRAs if needed, and Enable or disable Uspcale (Uspcaled and Refined with Ultimate SD Upscaler).
Previews

At the end you'll find the positive prompt preview to check if everything is okay if you add content in wildcards, the "Raw" preview shows you the image before Uspcale and Refinement, and the last preview with the final image uspcaled and refined.
Ressources
Custom Nodes should be found by the ComfyUI Manager, if some are missing, thanks to notify me.
Main ressources
-- SVI 2.0 Pro LoRA --
https://huggingface.co/Kijai/WanVideo_comfy/tree/main/LoRAs/Stable-Video-Infinity
-- VAE Bf16 --
https://huggingface.co/Kijai/WanVideo_comfy/commit/a328a632b80d44062fda7df9b6b1a7b2c3a5cf2c
-- Text Encoder Bf16 --
https://huggingface.co/Kijai/WanVideo_comfy/blob/main/umt5-xxl-enc-bf16.safetensors
Suggested Models
-- WAN 2.2 Enhanced NSFW (FastMove) --
https://civitai.com/models/2053259?modelVersionId=2520801
-- Standard GGUF models + Lightning LoRAs (CFG 1.5) --
https://huggingface.co/QuantStack/Wan2.2-I2V-A14B-GGUF/tree/main
https://huggingface.co/lightx2v/Wan2.2-Lightning/tree/main/Wan2.2-T2V-A14B-4steps-lora-250928
-- WAN 2.2 Enhanced NSFW NoLightning SVI --
https://civitai.com/models/2053259?modelVersionId=2609141
This workflow is under constant optimisation, expect to see a V2 at some point. I hope i didn't forget something, otherwise I'll ad it. Feel free to ask questions if needed (use my discord link on my profil, it's easier for everyone).
Thank you for using this ComfyUI workflow. Please use it responsibly and respectfully.
This workflow was created for creative, technical, and personal experimentation — not for harm, harassment, or any form of abuse.
HAVE FUN 😁
SVI 2.0 Pro v1.0
What is SVI (Stable Video Infinity)?
Stable Video Infinity (SVI) is a video generation extension designed to maintain temporal coherence and visual consistency over long or continuous video sequences. Unlike standard generation, SVI actively manages cumulative drift and transitions between segments.
Advantages vs standard Wan2.2 I2V:
Supports much longer, seamless video sequences
Improved temporal stability and reduced visual drift
Smoother transitions across frames and segments
Disadvantages:
Weaker prompt interpretation
Less precise camera movement understanding
Videos tend to be less dynamic
In short:
Wan 2.2 is faster and simpler. SVI extends Wan 2.2 to prioritize long-term stability and continuity, at the cost of performance and complexity.
⚠️ Warning
As the video length increases, a gradual loss of overall quality can occur over time. This is a normal and expected effect when multiple video generations are chained together. It is recommended to keep the video length at 30 seconds or less.
SVI 2.0 Pro - V1.0
This workflow includes:
I2V with SVI 2.0 Pro (up to 50 sec video in one shot)
Auto prompt translator
Frame Interpolation (RIFE-VIF)
S2V with MMaudio (No audio source needed)
Upscalers x2-x4 (Upscaler Tensorrt(x4) + Video Upscaler(x2))
Group controls by running groups individually
Text To Speech
Voice Capture
Simple Voice Creation
Voice Emotion Guidance
Lip Sync
How this thing works?

The SVI 2.0 Pro group now replaces the standard I2V group (which is still available).
The other groups are the same as before. If there have been any additions or changes, please refer to the yellow text boxes in the workflow.
Preparation

As usual, set your initial parameters here, such as duration, shifts, sigmas, CFG, initial image, and image size.
The SIGMAS value for I2V is 0.900 but you can go down to 0.875 if needed.
Groups activation

Each step has two groups: a setup and debug group that is visible, and a processing group in the Inferences subgraph. *
*IMPORTANT:
Each step must have both corresponding groups active.
Setup and Debug

First, load the LoRAs you're applying to all the steps, such as the SVI LoRAs and the Lightnings. Add more as needed.

The LoRA loaders for each step are applied only to the corresponding step.
Model selection is done from the "Load Models" widget in the subgraph. *
Write your positive prompt in your preferred language using the automatic translator. A text preview is displayed aside it so you can check the translations for accuracy if needed. It is suggested to keep the basic end prompt already written at each step.
You then have a video preview of the step and a comparison between the starting image and the final image so that you can make the necessary corrections if needed.
*IMPORTANT:
If you are not using a quantized model (GGUF), you must enable quantization in the model loader node inside the subgraph.
Inferences groups

The Inference Groups subgraph contains all the groups processing the steps.
In principle, you don't need to make any adjustments, but if you want to access the seeds and samplers, everything is there.
You can change the sampler for all groups at once via the subgraph widget.
Final Videos
The end videos are in 16 and 24 fps without interpolation for comparison, and in 24 fps with interpolation (RIFE-VFI). Change the values as needed.
Ressources
Custom Nodes should be found by the ComfyUI Manager, if some are missing, thanks to notify me.
Main ressources
-- SVI 2.0 Pro LoRA --
-- VAE Bf16 --
https://huggingface.co/Kijai/WanVideo_comfy/commit/a328a632b80d44062fda7df9b6b1a7b2c3a5cf2c
-- Text Encoder Bf16 --
https://huggingface.co/Kijai/WanVideo_comfy/blob/main/umt5-xxl-enc-bf16.safetensors
Suggested Models
-- WAN 2.2 Enhanced NSFW (FastMove) --
(All sample vids were done with this one without any other LoRAs than SVI 2.0)
https://civitai.com/models/2053259?modelVersionId=2520801
-- Standard GGUF models + Lightning LoRAs (CFG 1.5) --
https://huggingface.co/QuantStack/Wan2.2-I2V-A14B-GGUF/tree/main
https://huggingface.co/lightx2v/Wan2.2-Lightning/tree/main/Wan2.2-T2V-A14B-4steps-lora-250928
-- WAN 2.2 Enhanced NSFW NoLightning SVI --
// Didn't try this one, it's the same I'm using but newly released for SVI //
https://civitai.com/models/2053259?modelVersionId=2609141
This workflow is under constant optimisation, expect to see a V2 at some point. I hope i didn't forget something, otherwise I'll ad it. Feel free to ask questions if needed (use my discord link on my profil, it's easier for everyone).
Thank you for using this ComfyUI workflow. Please use it responsibly and respectfully.
This workflow was created for creative, technical, and personal experimentation — not for harm, harassment, or any form of abuse.
HAVE FUN 😁
AIO Workflow for Long video with scenario and automation.
I hope you'll be indulgent with this worklfow (I started ComfyUI from scratch and alone in August) !
The goal of this workflow is to gather everything I need in one place and to be able to chain them together. And I think it's good enough to be shared.
V2.0
This workflow includes:
Scenario control by Index
Select duration of each Index individually
Auto prompt translator
Color Match
FaceSwap (ReActor Faceswap)
Frame Interpolation (RIFE-VIF)
S2V with MMaudio (No audio source needed)
Upscalers x2-x4 (Upscaler Tensorrt(x4) + Video Upscaler(x2))
Group controls by running groups individually
Select FaceSwap activation on each Index Individually
**New** Seed control on each Index individually
**New** Select Samplers total steps on each Index individually
**New** Select CFG on each Index individually
**New** Select Shifts on each Index individually
**New** Text To Speech
**New** Voice Capture
**New** Simple Voice Creation
**New** Voice Emotion Guidance
**New** Lip Sync
What has changed?

Overall, more control over each index individually, better UI and repair of poorly connected links between certain nodes.
Hub

This is the workflow hub, which allows you to move between different groups (I2V-MMaudi-Upscale-Etc.) using keyboard shortcuts, making navigation easier. The old post-I2V processing groups have been arranged in subgraphs. The hub allows you to activate or deactivate a group as needed using the group bypasser. No more GroupExecutor node !
Don't forget to disable any groups you don't use!
Preparation

Initial Parameters
You can now choose which index you want to start generation with; you are no longer required to start with index 0. The total step counter is calculated so that you cannot perform more steps than the total index.
Select Image Size
You can now check the dimension of the image with a preview, mainly used to process and debug.
Index Duration
In addition to being able to choose the duration per index, you can now choose whether or not to apply the same value to all index.
Scenario and Text Switching

Pre/Postcondition
Previously you only had one post and precondition for all index; now you can impose a different one for each index.
Index controls

Here are most of the new features of this workflow version 2.0.
Control by Index - Seed - Shift - CFG - Samplers total steps
You are no longer limited to a single global seed for all index. You can now control the seed for each index and lock it if you wish. As with the duration value, you can choose whether or not to apply the same seed to all index. The same logic applies to other groups with this option.
Samplers total steps
Choose between 4/6/8 total steps on the samplers, the ration is 50-50, it will always be for example: 6 total steps = 3 High noise / 3 Low noise. You can do more total steps if wanted by changing the maximum value in the properties of the slider. If you don't want the 50-50 ratio, disconnect the links and node connected to the Start/End at steps in the samplers.
Process and Debug

More controls mean more parameters, so I added a few preview on every parameters to check the generation. The last image of the final video is saved so that it can be used to continue a video or to change the starting index.
No other major changes for the I2V part.
MMaudio modifications

You now have two groups here: the main group and the MMAudio + source audio assembler.
Load Custom Video
You can now load a video outside the workflow to process it using its full path. I don't use the "upload" loader because if the video is too long or large, the module can't load it (this has been observed with videos 25 seconds or longer).
Audio Source + MMaudio Assembly
This group is only used if you already have audio on the video before processing it in MMAudio. It will assemble the audio tracks while allowing you to calibrate their volume, which is especially useful if you are using lip sync beforehand.
Upscale x2-x4
No changes, only added the possibility of loading a video outside the workflow. Uspcaler x2 is renamed in "No TensorRT" and x4 in "TensorRT". It is also possible to do x2 using RealESRGANx4 from the TensorRT upscaler using the "resize to" function of the node.
Go to 72Fps
Same as the Uspcale group, no significant modification.
Text-to-Speech and Voice cloning

This is one of the new group added in v2.0. Here you will deal with everything related to voice creation, from voice recording to cloning and vocal emotion management. Same activation logic by groups.
Don't forget to disable any groups you don't use!
Voice Record

Here you can record a voice for later use in cloning or emotion vectoring. Each audio generation is processed and enhanced by the two enhancement nodes; this logic is applied to the entire TTS group.
Voice Creation

Here you can create a voice from scrap using a text prompt, gender selection, the speed and the pitch wanted.
Voice Cloning

Use a recorded voice to clone it. You can make it say whatever you want by entering a text prompt. You also have the option of using LoRa audio, but it's not required. The second group on the right is only used to make adjustments to the processing of the already generated voice. I suggest you to try it in different language, I've tried it in French and Spanich without hearing any accents.
Voice Emotion Vectors

Here are the three groups of emotion vectors. First, select the group to activate on the left. Only activate one group at a time. Next, select your audio source, which will serve as your reference for the voice. This is the voice you will use as output. Then, write your prompt. The first group allows you to apply emotions from another audio reference. You can record an emotional reference, an audio clip with emotions on it, and use that as your reference.
In the second group, you won't use audio-emotional references, just a source: the voice to use. Then, you'll adjust the emotions by value, from 1 to 1.4, and experiment to find the intonations that work best for you.
And finally, the last group is the same. Instead of controlling the emotion vectors by value, here you control the emotion vector by textual description. Like your audio prompt for the dialogue, here you describe the desired emotions.
Lip Sync

Here's the latest group added to this workflow for Lip Sync. First, choose the audio to sync. Then, depending on what you have installed, use LatentSync 1.5 (recommended) or the fallback solution if you can't use Latent Sync: Wav2Lip + Faceswap. The faceswapper is only used to compensate for and correct the poor quality of Wav2Lip as best as possible.
Video Stitcher
The last group is a simple video stitcher. It assembles different videos and their audio together.
This workflow is under constant optimisation. I hope I didn't forget something, otherwise I'll ad it. Feel free to ask questions if needed (use my discord link on my profile, it's easier for everyone). If something is not working or wrong notify me please.
Note:
For your own mental health, hide the links in the UI. Some of you mabye noticed that some nodes are hidden, this is made on purpose for the sake of unexperimented users. I'll find a way to make this cleaner one day.
If you need more explanations, first refer to the V1.0 section below. Feel free to give feedback, and enjoy!
Thank you for using this ComfyUI workflow. Please use it responsibly and respectfully.
This workflow was created for creative, technical, and personal experimentation — not for harm, harassment, or any form of abuse.
HAVE FUN 😁
NEW - V1.5
This workflow includes:
Scenario control by Index
Select duration of each Index individually
Auto prompt translator
Color Match
FaceSwap (ReActor Faceswap)
Frame Interpolation (RIFE-VIF)
S2V with MMaudio (No audio source needed)
Upscalers x2-x4 (Upscaler Tensorrt(x4) + Video Upscaler(x2))
Group controls by running groups individually
**New** Better/Easier UI
**New** Select FaceSwap activation on each Index Individually
**New** Bypass Color Match without breaking the flow
**New** FaceSwap preview
**New** Color Match added to Upscale and Interpolation groups
**New** Seed control
**New** Face Model repair
What has changed?
Better UI
Before:

Now:

Every switch node with a selection to do is now replaced by a slider with the same selection logic. Just make your selection by sliding it to the wanted mode.
Now:

The LoRA Loaders chained are replaced by Power LoRA Loader, this allows LoRAs to be stacked by index without having to add more loaders.
Face Swap

This group is the Swap Control Logic made to control the activation of the Face Swap on each index, please don't touch it unless you know what you're doing.
Now choose your Face Image source using the slider. If you have a Face Model (You have everything you need in the pack from ReActor FaceSwap to build face models) change mode in the node below (On "Active").
Now you can choose if you want to use the Face Swap or not on each index individually, adding more control. Like the group description, 0= Disabled / 1= Enabled.
New preview only for monitoring the swap and the current index working.
(Now the preview on the debug section receive the video before any other treatement. This is made to check your generation before the swapping section to prevent any problem and sparing time if you have to restart)
Seed control

Added a seed control node right on the High noise Ksampler, set by default on "Randomize Each Time". When you find a good seed, you can use the last button to reuse it and have it locked.
Color Match

The Color Match group can now be bypassed without breaking the flow. You can also choose not to bypass the group and simply disable it using the slider; the flow will then simply ignore the Color Match node.
Color Match is now also integrated in the Upscale and Frame Interpolation sections after noticing color shifts following the treatments.
Note:
For your own mental health, hide the links in the UI. Some of you mabye noticed that some nodes are hidden, this is made on purpose for the sake of unexperimented users. I'll find a way to make this cleaner one day.
If you need more explanations, first refer to the V1.0 section below. Feel free to give feedback, and enjoy!
V1.0
This workflow includes:
Scenario control by Index
Select duration of each Index individually
Auto prompt translator
Color Match
FaceSwap (ReActor Faceswap)
Frame Interpolation (RIFE-VIF)
S2V with MMaudio (No audio source needed)
Upscalers x2-x4 (Upscaler Tensorrt(x4) + Video Upscaler(x2))
Group controls by running groups individually
How this thing works?
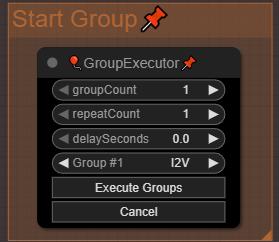
First important thing! You have to run groups using the "GroupExecutor" nodes, this will launch only the selected group. This is designed so that all your groups can remain active without loading the models of standby groups. If you run a generation using the "Execute" button in ComfyUI, it will load the MMAudio models in parallel at the beginning of the I2V generation, and you will have less VRAM available for I2V. Sometimes, one of the "GroupExecutor" node will stop to work (still trying to find why), just replace it be a new one or another one from the workflow.
 Each part of the process is separated into 4 groups: Image to Video, Sound to Video, Upscalers, Go to 72 FPS (Frame Interpolation).
I2V
Step 1: I2V Enhancement - Choose the enhancements you want for your video.
Select source Image by choosing 0 or 1 on the "Select Source Image":

0 = Load an individual image
1 = Load an image from folder and process the number of images set (this is for AFK and let the workflow running, it will loop and restart with another image in the folder path after each generation - Don't forget to set your folder path). Still need improvements, working on it.
Step 2: Preparation - Set the parameters of the video

There you gonna set the batch size, the total step counts (Each Index is 1 step count, if your step count is 3 you will use 3 index, from index 0 to index 2).
Resize your image on the largest size (Not using the same image resolution everytime so it's intended to be an automation, if you want more controls feel free to change the node).
Choose every Index duration individually with the sliders (sliders are set to the same frames value as WanImageToVideo, increasing by 4 and can be changed with another INT value node but need to be connected to Any Switch Index hidden behind the negative prompt box).
Step 3: Loaders - Set the your models and LoRAs
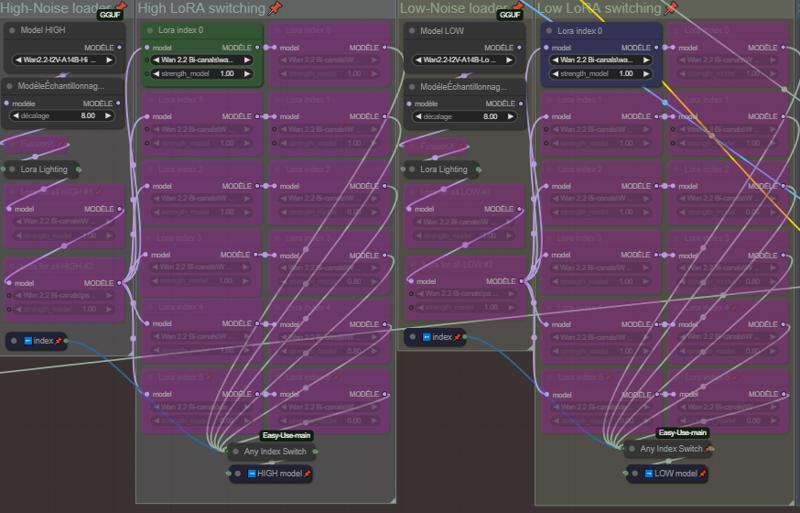
Choose your models (GGUFs) on High and Low Noise, your Lightning LoRAs and your FusionX LoRAs (Lightning and FusionX LoRAs are not mandatory, if you don't use them just deactivate the nodes).
LoRAs in the High-Noise loader and Low-Noise loader groups are generals LoRAs applied on each index.
Choose your LoRAs on each Index. This part is set for 5 index (starting from index 0, feel free to add or remove them. If you add some, connect them to the AnySwitchIndex under each column).
Step 4: Prompts - Set your scenario
🚨🚨🚨🚨 The prompt has an integrated translator if your not good with English 🚨🚨🚨🚨
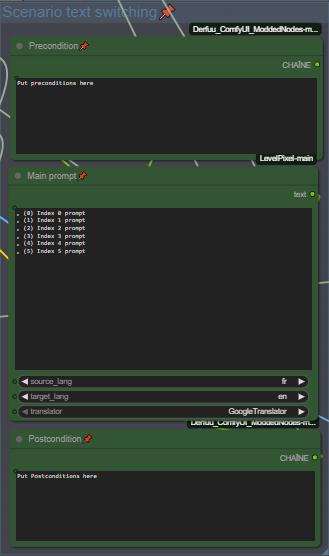
Set your Pre and Post conditions and start to prompt your scenario for each index. Index separation in prompt is made by a line break, I use ", (0)", ", (1)" separations to have a better overview of my scenarios (there is many other way to do, feel free to change the separation mode if need, hidden behind the goup nodes).
🚨🚨 Don't forget to set the source and target language for translation 🚨🚨
Step 5: FaceSwap - Set the parameters for Face Swapping
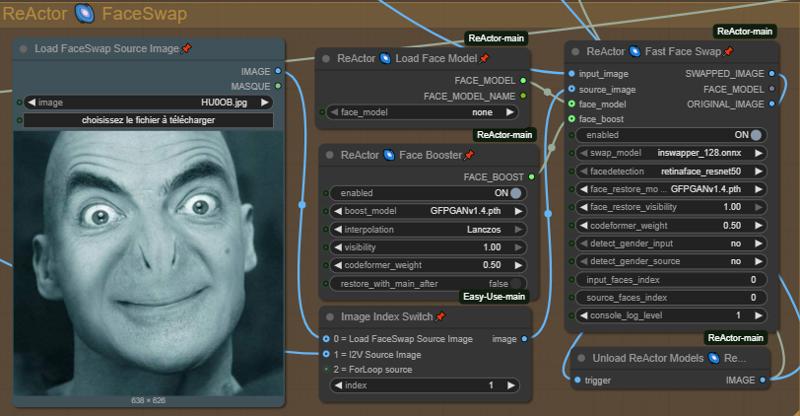
Wan2.2 is known to have many LoRAs that cause face drifts/changes, so I added ReActor Faceswap to compensate the face drift of some LoRAs. The settings are good like this but feel free to change them to experiment. (Available in ComfyUI Manager, models will be automatically downloaded).
Choose your image source for the swapping:
0 = Load a source image
1 = Use start image as source
Step 6: Aspect Ratio Logic + Color Match
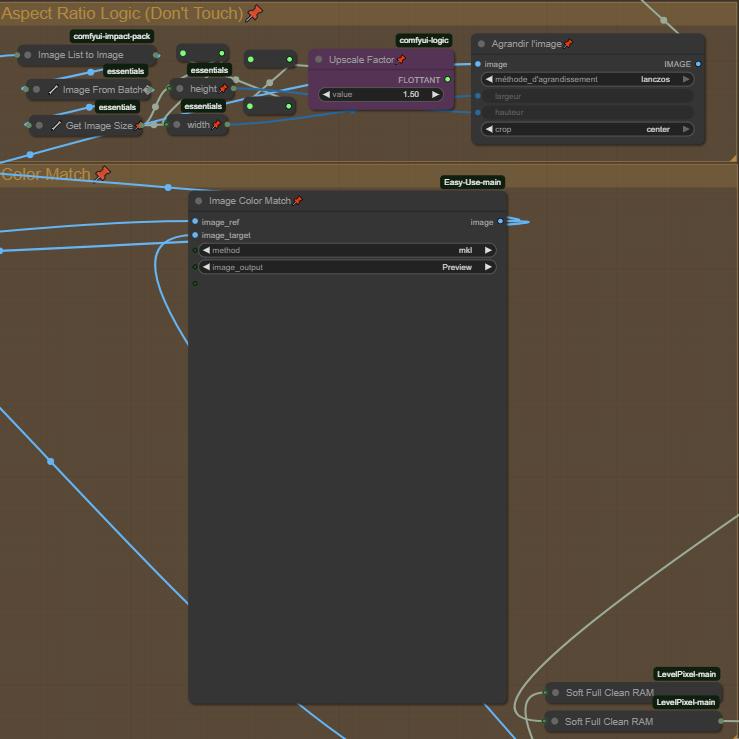
Aspect Ratio Logic is a simple logical zoom to improve a bit the video, change the Upscale Factor to change the zoom.
Image Color Match is intended to keep the same colors as the image source and match them, can't be disabled, even if you bypass it, it will send nothing to the next node. If you encounter some color problems you can change the color "Method" or delete the node. This will be fix in a futur updated version.
(Important)
Step 7: Final video and chain fonction
The folder path of every final video is saved in a text file (Save Text node), the purpose of this is to chain the generation, when your done with I2V you can load the last video generated with the filename saved in the text file and loaded by the next group at start. If you want to change the text file name be sure it's matching with the others files name in "Save Text and Load Text" nodes !
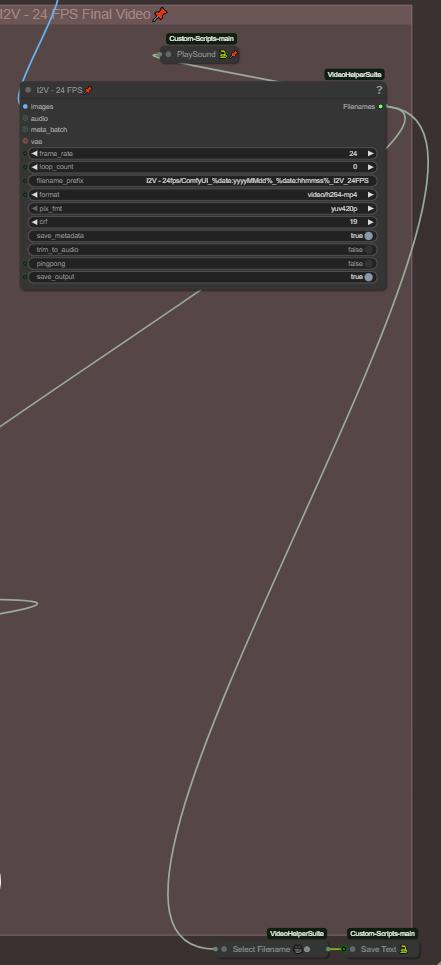
The final video is set to 24Fps for MMaudio for a better compatibility (MMaudio is trained at 24fps), if you don't intend to generate Audio on your video, you can bring it down to 16fps.
You also have a "Playsound" who is gonna notify you when the workflow is done with the generation. Not mandatory, you can delete them if you don't want them.
Step 8: Monitoring process and debug
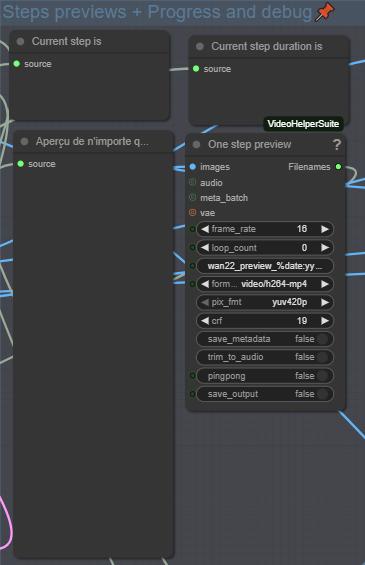
This part will show you the current index working, his duration in total frames, his prompt and a preview for each index. This allows you to monitor your generation and make the necessary adjustments.
S2V
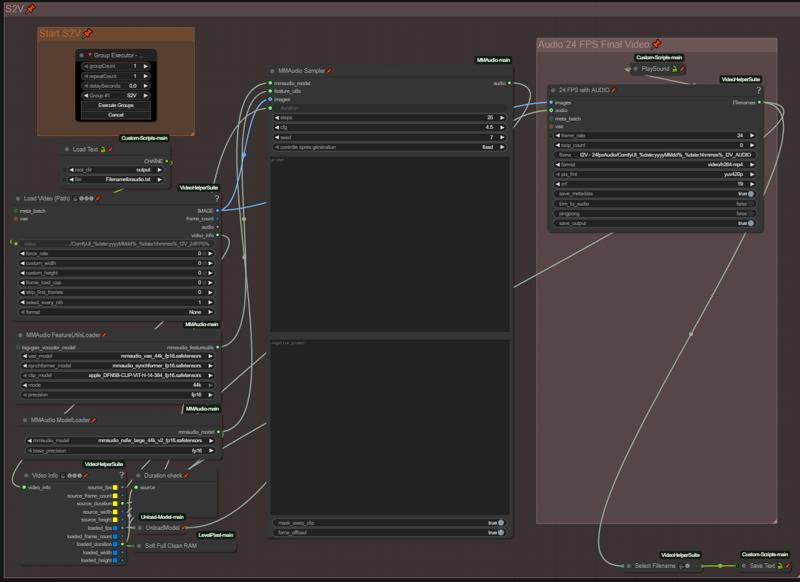
There you gonna prompt your audio, I recommand to use NSFW MMaudio, way better results than the basic model. Everything is automated, so when your positive and negative prompt is done, just run the group. It will automatically load the previous I2V generated through the "Load Text" node and add sound to it.
Upscalers x2-x4
Step 1: Choose your source video (With or without audio)
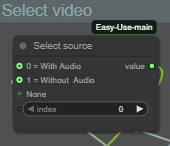
There you are just choosing if your are uspcaling the audio video from MMaudio group or the video from I2V group without audio.
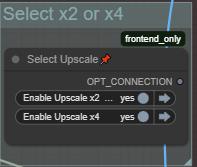
There you are choosing wich Uscale group is working.
NOTE:
The x2 Upscaler is way more slow than the x4 because it's not on TensorRT, if someone have a better solution to quick Upscale in x2, I'm open to suggestions.
The x4 Upscaler works with TensorRT, if you already have Upscale models in .\models\uspcale_models they will automatically be imported. Only works with x4 upscalers, tried to import and convert x2 models but doesn't work.
Then don't forget to change the parameters of the Upscalers if needed and run the group with the "GroupExecutor" node.
Frame Interpolation (Go to 72Fps)
Same logic as the previous group.
Step 1: Choose your source video (With or without uspcale or audio)
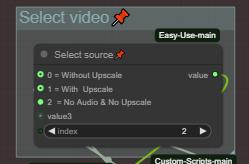
Depending on the last generation group.
0 = Without Upscale (Loading the MMaudio 24fps audio video)
1 = With Upscale (Loading from the Upscaled video)
2 = No Audio & No Upscale (Loading from the video from I2V group)
Step 2: Adjustments
The final video is set to 72Fps only to keep the sound synchronized if you used the Audio group. If you don't use the Audio group, you can bring it down to 60 fps if needed.
And like the previous group, don't forget to change the Interpolator paramaters if needed.
Ressources
Custom Nodes should be found by the ComfyUI Manager, if some are missing, thanks to notify me.
I'm using this workflow on a RTX 5080 16GB and 64GB RAM
GGUF models and VAE:
https://huggingface.co/QuantStack/Wan2.2-I2V-A14B-GGUF/tree/main
NSFW ClipVision:
https://huggingface.co/ricecake/wan21NSFWClipVisionH_v10/tree/main
Umt5 xxl encoder GGUF:
https://huggingface.co/city96/umt5-xxl-encoder-gguf/tree/main
NSFW MMaudio:
https://huggingface.co/phazei/NSFW_MMaudio
Lightx2v LoRAs:
https://huggingface.co/lightx2v/Wan2.2-Lightning/tree/main/Wan2.2-I2V-A14B-4steps-lora-rank64-Seko-V1
https://huggingface.co/lightx2v/Wan2.2-Lightning/tree/main/Wan2.2-T2V-A14B-4steps-lora-250928
FusionX LoRA:
https://huggingface.co/vrgamedevgirl84/Wan14BT2VFusioniX/tree/main/FusionX_LoRa
This workflow is under constant optimisation, expect to see a V2 at some point. I hope i didn't forget something, otherwise I'll ad it. Feel free to ask questions if needed (use my discord link on my profil, it's easier for everyone).