flux-lora-settings-tester-v1

Details
Download Files (1)
Model description
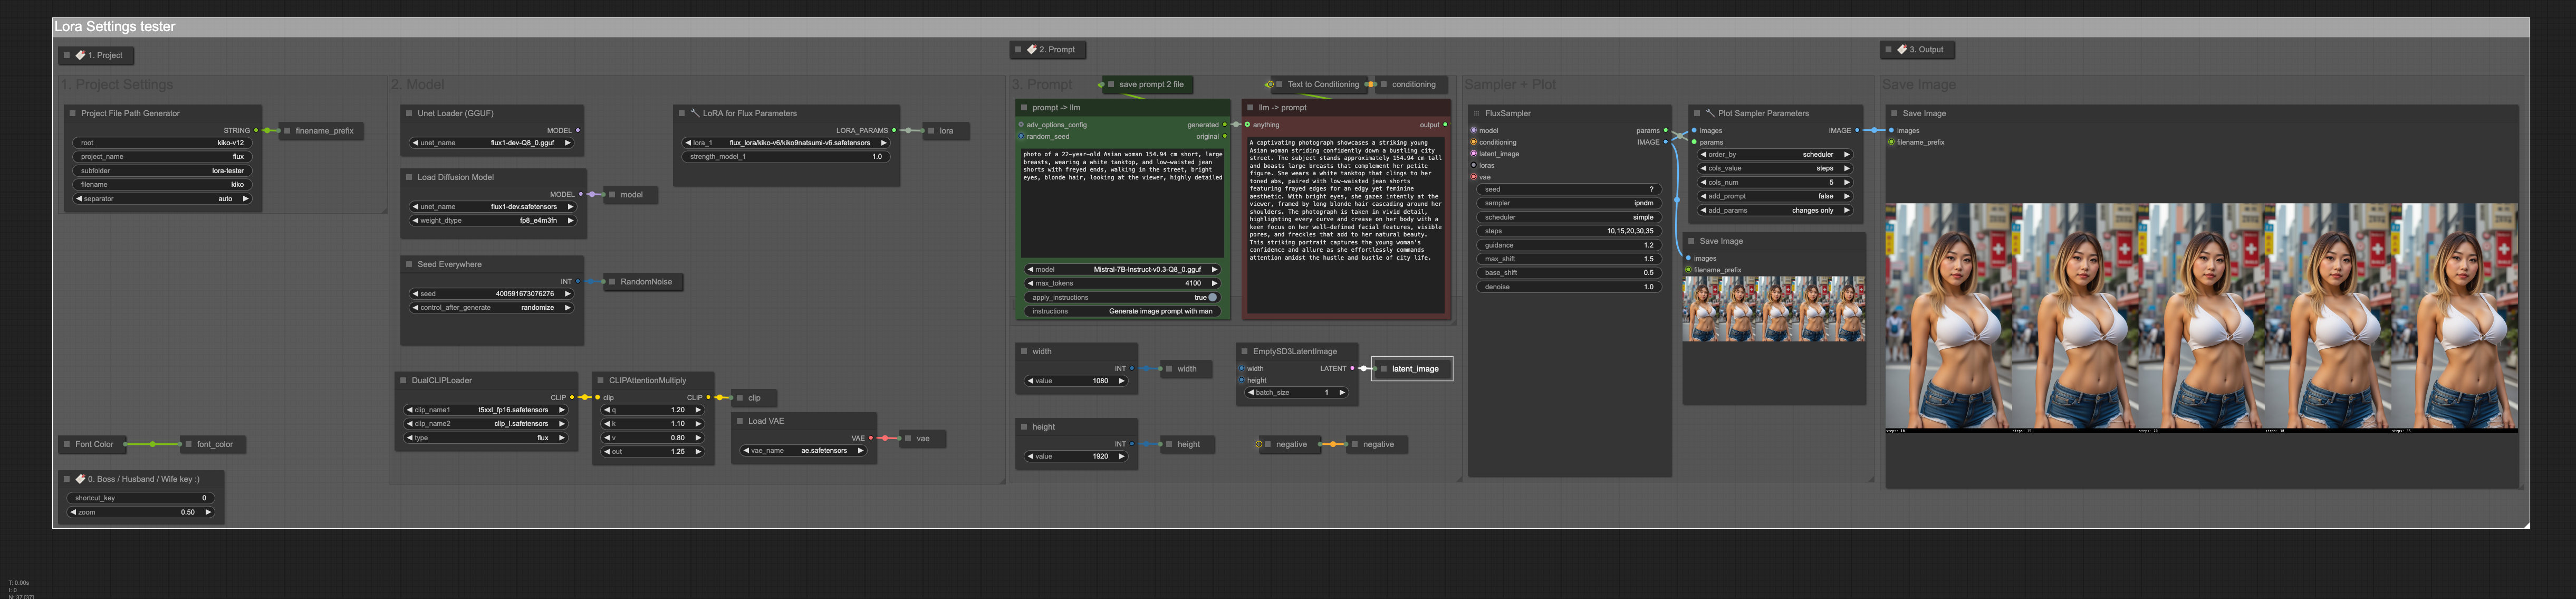
ComfyUI Workflow: LoRA Settings Tester
This ComfyUI workflow is designed to test LoRA (Low-Rank Adaptation) settings and visualize the impact of various parameters on the generated outputs. The workflow includes a plot feature for comparing results side by side, providing an intuitive way to evaluate changes.
Custom Nodes
Anything Everywhere? / https://github.com/chrisgoringe/cg-use-everywhere
Bookmark (rgthree) / https://github.com/rgthree/rgthree-comfy
JWInteger / https://github.com/jamesWalker55/comfyui-various
LorasForFluxParams+ / https://github.com/cubiq/ComfyUI_essentials
PlotParameters+ / https://github.com/cubiq/ComfyUI_essentials
ProjectFilePathNode / https://github.com/MushroomFleet/DJZ-Nodes
SaveText|pysssss / https://github.com/pythongosssss/ComfyUI-Custom-Scripts
Searge_LLM_Node / https://github.com/SeargeDP/ComfyUI_Searge_LLM
Seed Everywhere / https://github.com/chrisgoringe/cg-use-everywhere
Simple String / https://github.com/chrisgoringe/cg-use-everywhere
Text to Conditioning / https://github.com/WASasquatch/was-node-suite-comfyui
UnetLoaderGGUF / https://github.com/city96/ComfyUI-GGUF
easy showAnything / https://github.com/yolain/ComfyUI-Easy-Use
FluxSamplerParams+ / https://github.com/cubiq/ComfyUI_essentials
Workflow Features
1. Exposed Parameters
This workflow exposes several key settings for fine-tuning and experimentation:
Model StrengthDescription: Controls the intensity of the LoRA model's influence during image generation.
Exposed Values: 0.5, 0.6, 0.7, etc.
Effect: Higher values increase the LoRA model's impact, while lower values reduce it.
Description: Determines the algorithm used for sampling during the diffusion process.
Exposed Options:
ipndm,euler, etc.Effect: Different samplers produce varying levels of detail, sharpness, and adherence to prompts.
Description: Controls the schedule of noise reduction during the diffusion process.
Exposed Options:
beta,simple, etc.Effect: Influences the pace and smoothness of the denoising process.
Description: Scales the attention weights for specific tokens in the text prompt.
Effect: Fine-tunes how strongly individual parts of the prompt affect the output. Values >1 amplify token importance, while values <1 reduce it.
2. Visual Output
The workflow generates a plot showing side-by-side comparisons of the outputs under different parameter settings. This allows for easy evaluation of:
Variations in model strength.
Differences between samplers.
Impact of scheduler choices.
3. Save Image
Outputs are automatically saved with filenames reflecting the parameter settings used, making it easy to track and compare results.
How to Use
Set LoRA Parameters:
Adjust the
model strengthto experiment with the influence of the LoRA model.Choose a
samplerandschedulerto explore their effects.
Customize Prompt:
Enter your desired text prompt in the prompt node.
Run the Workflow:
Execute the workflow to generate outputs with different parameter settings.
Review Results:
Use the plot to compare outputs side by side.
Saved images can be reviewed in the designated output folder.
Practical Tips
Start Simple: Use default values and adjust one parameter at a time for clearer insights.
Experiment with Combinations: Test different combinations of samplers and schedulers for optimal results.
Use Clip Attention Multiply Sparingly: Small adjustments (e.g., 1.1 or 0.9) can significantly affect results.
This workflow provides a robust tool for testing and fine-tuning LoRA settings in ComfyUI, enabling users to achieve their desired artistic or practical outcomes with ease.