Grumpy Carebear's Movie Maker 2 - WAN2.2 i2v long videos
Details
Download Files (1)
About this version
Model description
WAN2.2 Multi-Segment Video Generator (Dumbed Down for Us N00bs, But Powerful Enough for Wizards)
UPDATE – 17 Nov 2025, 16:28 PDT
Version 2 rebuilt entirely from scratch. Everything now works flawlessly (from my testing). I’m sure y’all will tell me where I screwed something up anyway. Let’s go.
All these ComfyUI workflows look like someone spilled spaghetti on a motherboard, right?
Where do you click? What knobs do you turn? Why did touching one setting break everything?
After several days of playing with Coyotte’s Moviemaker — which is genuinely awesome, provided you are smarter than me — I decided I needed something a lot simpler. Something I could actually use without summoning an Old God by accident.
This workflow is that.
And now it can be your workflow too.
What This Workflow Does
This project generates a four-segment WAN2.2 video, where each segment has its own:
Prompt
Negative prompt
LoRA stack
WAN2.2 motion configuration
Steps / CFG / sampler
Video length
Interpolation settings
Each segment becomes its own mini-video.
All four are interpolated, merged, and stitched into one continuous final MP4 — automatically, inside ComfyUI, with no external scripts.
It is stupidly easy to use once installed. It just looks scary.
How the Workflow Operates (In English)
You provide:
One starting image
Up to four prompts (look for green boxes)
The pipeline then:
Analyzes your starting image with JoyCaption
Extracts LoRA trigger words via LoraManager
Builds a combined text prompt
Runs WAN2.2 to create a video segment
Converts it to frames
Interpolates with RIFE for smoother motion
Appends the frames to an internal accumulator
Repeats this whole process four times
At the very end, all accumulated frames go into VideoCombine
You get one final stitched video
(Optional) Upscale + audio layers can be applied afterward
The purple-ish nodes = tweakable but optional.
The red nodes = model loaders — advanced users only.
The black nodes = do not touch unless you enjoy pain.
Using LoRA Manager (Super Easy)
Install LoraManager via ComfyUI Manager.
Let it index your LoRAs (can take a minute).
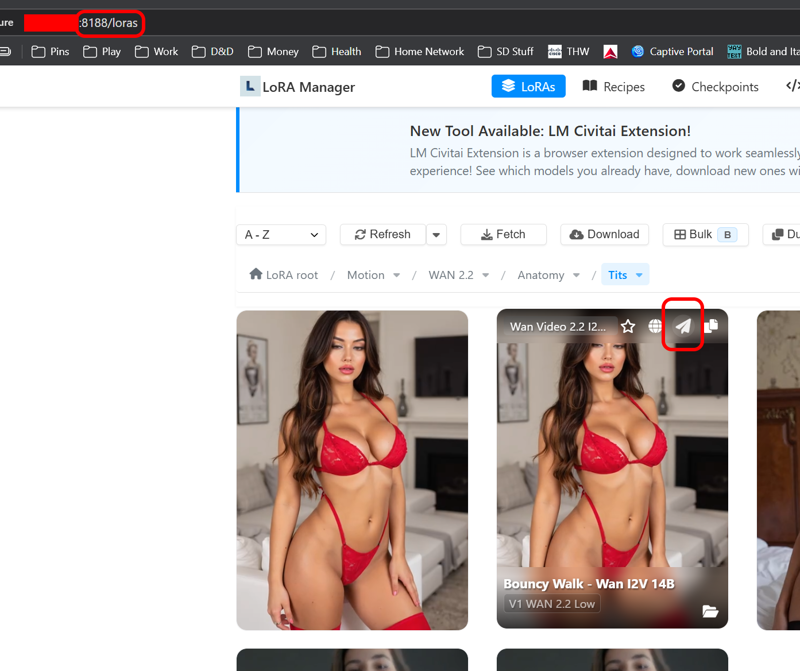
Pick a LoRA and hover over it — you’ll see a little Send arrow.
Choose which LoRA loader it should go to.
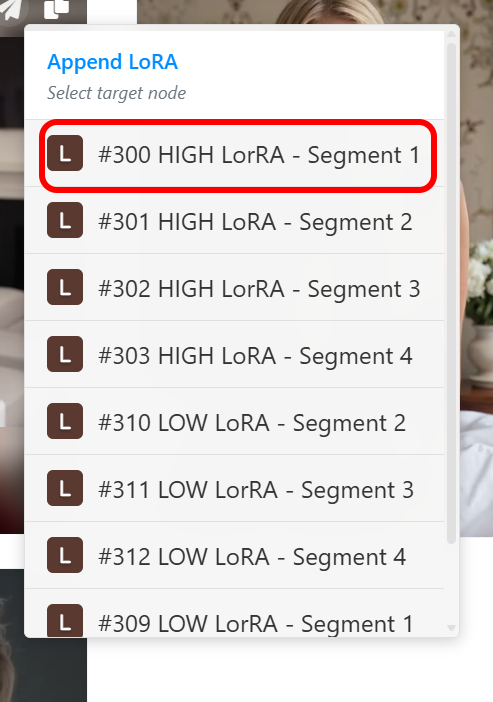
Switch back to ComfyUI; it will appear instantly.
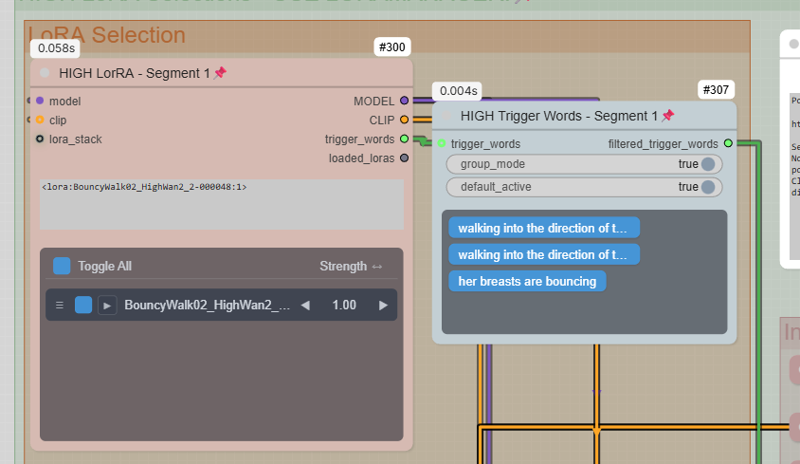
You’ll see:
Trigger words
A slider for strength
Click any trigger words you don’t want to deselect them
The workflow automatically merges these trigger words into your prompt.
How to Actually Use the Workflow
1. Load the Workflow
Open the .json in ComfyUI.
2. Install Missing Nodes
Use ComfyUI Manager → Install Missing Nodes.
Restart.
3. Install Missing Models
ComfyUI Manager → Model Manager
Filter: In Workflow → Install all.
4. Set Your Starting Image
Look for the starting image block.
5. Enter Your Four Prompts
Again, the green boxes.
6. Adjust Segment Lengths (Optional)
Each segment can be a different duration.
7. Run It
At the end of the loop, the workflow automatically creates:
4 WAN2.2 segments
4 interpolated frame batches
1 continuous stitched MP4
On an RTX 5090, a 16-second video takes ~23 minutes.
On weaker GPUs, consider:
Lowering JoyCaption settings
Making each segment 3–4 seconds max
Lowering resolution or steps
Required Nodes
All must be installed via ComfyUI Manager:
ComfyUI-Easy-Use (loops, batch ops)
VideoHelperSuite (video output)
Frame-Interpolation (RIFE)
Impact Pack
ComfyUI-Essentials
TripleK Sampler + WAN2.2 motion models
LoraManager (optional but highly recommended)
JoyCaption and LoraManager are already wired into the workflow.
Tips for Best Results
If you dislike a segment, stop there — no point wasting time upscaling a bad base.
Keep an eye on the “working” video preview first.
Use LoRAs wisely — one per segment usually works better than stacking 12.
WAN2.2 motion LoRAs can change everything; experiment per segment.
For weaker GPUs, turn JoyCaption WAY down.
For anthro content, character LoRAs + pose LoRAs per segment can give amazing continuity.
Installation Summary (For True Beginners)
Install ComfyUI
Install ComfyUI Manager
Load this workflow
Manager → Install Missing Nodes
Restart ComfyUI
Manager → Model Manager → Filter “In Workflow”
Install everything
Restart
Load image, enter prompts, run
That’s it. No scripting. No Python. No ffmpeg. No Linux.
Final Thoughts
If this workflow sucks, please tell me — this is my first published workflow and I genuinely want to improve it.
If you enjoy it, or if it helps you make something cool, that’s awesome too.
Have fun moviemaking!